Back in Calcutta (now, Kolkata), India, when Ambee was about 14 years old, she noticed a man riding a bicycle with about 10 live chickens hanging upside down from the handle of his vehicle, while on her way to school. It seems to her that he was probably transporting these birds to a local slaughterhouse.
She could tell immediately that the birds were in great pain and were extremely fearful for being in a totally unnatural dimension for them.
Although she was still consuming chicken then, she kept thinking about animal cruelty and suffering of animals. However, she felt she was too small an entity to change something so big. She decided to leave it like that because she had no control over it. In 2006, after she became an engineering graduate, working, married and living in a new city, Mumbai, she made the decision to switch to a vegetarian diet. Her husband followed and stopped eating chickens altogether.
Ambee was diagnosed with Hypothyroidism and an autoimmune disease called the Hashimoto’s Thyroiditis in 2010 and was on a moderate to high dose of Thyroxin. By 2016, she was quite upset about continuous intake of this drug as she realised that the medication was not curing her problem but rather making her more dependent on it. She began to read about alternative cures for her disease and came across stories of Tennis star Venus Williams about how she was able to manage her autoimmune disease by switching to a plant based diet.
One day, ater watching the documentary Forks over Knives, she and her husband decided to totally quit dairy and eggs.
She took up a Plant-based nutrition certification course by eCornell to equip her with the knowledge and confidence to start shifting her family to a plant based diet. Since then there has not been any looking back.
Meatless Movement recently asked Ambee to share her best recipes for snacks with our readers. Many of her recipes are kid friendly which encourages people to try plant based dishes more often at home.
- Vegan Vanilla Cupcakes with Vanilla Buttercream
- Spicy Chickpeas in Sweet Potato Jackets
- Potato Tofu Savory Pancakes
- Tangy Roasted Cauliflower
- Vegan Coconut Almond Laddoos (Sugar-Free, Oil-Free)
- Vegan Chocolate Pudding
- Vegan Hainanese Kaya
- Steamed Silken Tofu in Garlic Sauce
- Pumpkin Spice Cake
- Roasted Cauliflower Head in Soy Curry Sauce
- Chia Banana Chocolate Chip Loaf Cake
- Gluten-free Pumpkin Chia Almond Cake
Vegan Vanilla Cupcakes with Vanilla Buttercream
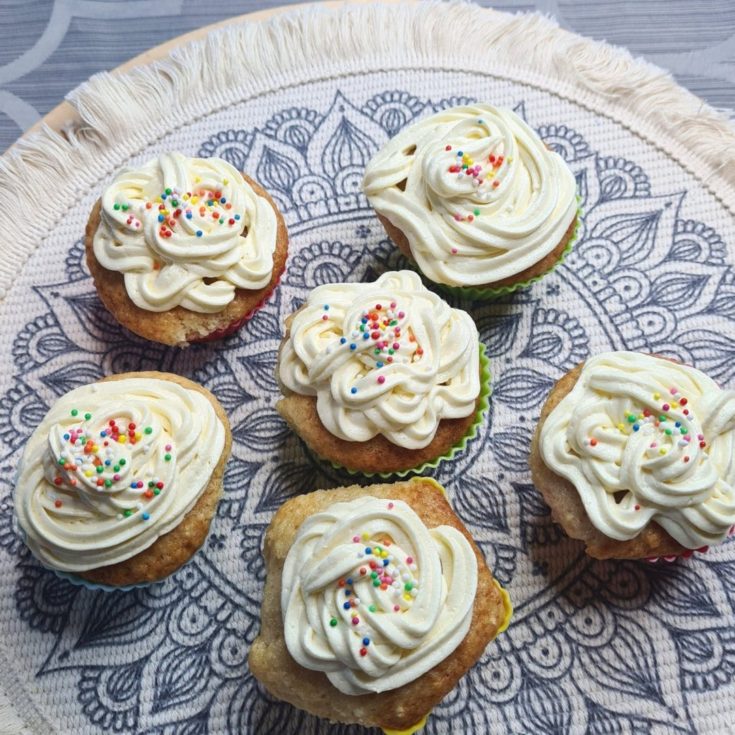
Vegan Vanilla Cupcakes with Vanilla Buttercream
This is something that I bake occasionally. Although vegan, these cupcakes are high in fat and sugar content because of which I bake them when there is a very special occasion like a birthday at home. They are easy and yummy!!
Ingredients
For Cupcakes
- 1 ¾ cup all-purpose flour or unbleached flour
- 1 cup sugar
- 1 tablespoon baking powder
- ½ teaspoon salt
- 1 cup non-dairy milk, I use soymilk
- ¼ cup + 1 tablespoon neutral flavored oil
- ¼ cup apple sauce (I make my own by boiling 1 or 2 peeled and diced apples in 1/4 cup of water)
- 2 teaspoon vanilla extract
For Buttercream
- 6 tbsp. vegan butter, at room temperature
- 2 ¼ cups powdered sugar
- 1 teaspoon vanilla extract
Instructions
- Preheat the oven to 180º C. Ready silicone cupcake molds or line a muffin tin with 12 baking cups and spray with cooking oil. Set aside.
- In a medium bowl, stir together the flour, sugar, baking powder, and salt. In a separate bowl combine the non-dairy milk, oil, apple sauce and vanilla extract. Add the wet ingredients to the dry and gently whisk together without overmixing.
- Scoop the batter into the prepared molds or muffin tin so that they are ⅔ of the way full.
- Bake for 20 minutes. Remove from the oven and let cool for 10 minutes before transferring to a wire cooling rack to cool completely.
- To make the buttercream, process the vegan butter in a bowl for about 3 minutes. Sowly add powdered sugar. Once the powdered sugar is incorporated, turn the mixer back up to high and beat for another 3-5 minutes until thick and creamy. Add vanilla extract and beat until combined. Optionally, to firm the buttercream, put it in the fridge for about 20 minutes before icing.
- Once the cupcakes are COMPLETELY cool, pipe buttercream onto the cupcakes. Serve immediately or store in an airtight container at room temperature for up to 3 days. Use edible sprinkles on top, optionally.
Nutrition Information
Yield
3Serving Size
1Amount Per Serving Calories 1489Total Fat 39gSaturated Fat 9gTrans Fat 5gUnsaturated Fat 27gCholesterol 18mgSodium 1012mgCarbohydrates 268gFiber 4gSugar 174gProtein 18g
Spicy Chickpeas in Sweet Potato Jackets
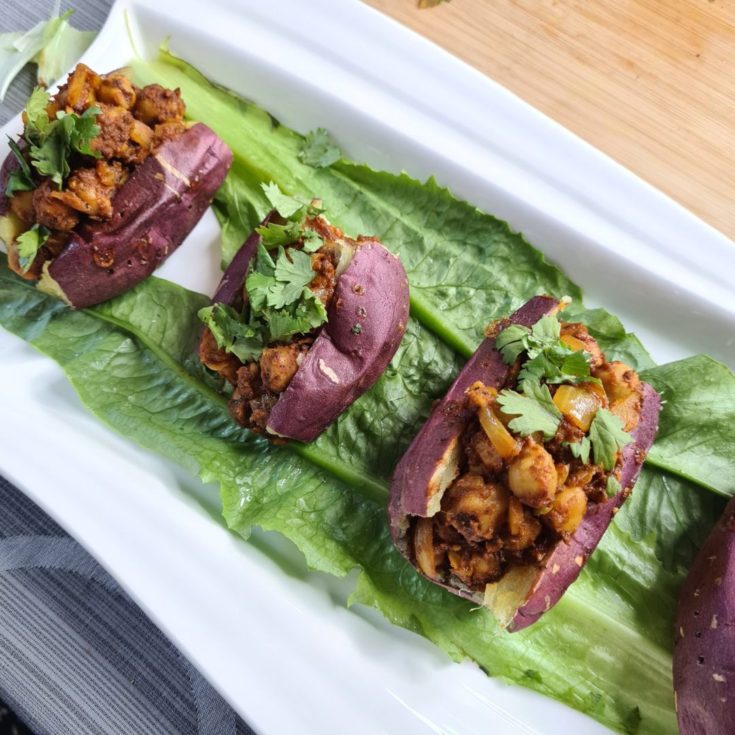
Spicy Chickpeas in Sweet Potato Jackets
Ingredients
- 4 sweet potatoes
- 1 tbsp cooking oil
- 1 tsp cumin seeds
- 1 inch piece ginger, finely chopped
- 2 garlic cloves, crushed or chopped
- 1 large onion, sliced
- 1 green chili, finely chopped
- 1 tsp garam masala powder
- 1 tsp coriander powder
- ½ tsp turmeric powder
- 1 tbsp tikka/tandoori masala
- 1 cup tomato puree
- 400g cooked or canned chickpeas (drained and thoroughly washed if using canned)
- Coriander leaves, hot sauce (optional) to serve
Instructions
- Heat oven to 180C. Prick the sweet potatoes all over with a fork, cover them with a bit of oil, put them on a baking tray and roast in the oven for 45 mins or until tender when pierced with a knife.
- In the meantime, heat oil in a pan. Add the cumin seeds till they crackle. Tip the ginger and garlic and cook till they are light brown. Add the onions and cook they are translucent.
- Now add the garam masala, coriander and turmeric powders and salt. Add a splash of water to cook the spices.
- Pour the tomato puree in and let cook till the mixture thickens. Cover for a few minutes and let cook. Set the chickpea aside.
- Once the sweet potatoes are cool and easy to handle, snip the ends of each of them. Slit through center of the sweet potatoes lengthwise, making sure not to cut through completely. Scoop out a bit of the flesh out of the sweet potatoes to make space for stuffing in the chickpeas.
- Stuff about 2 TBSP of the cooked chickpeas in each of the sweet potatoes. Garnish with coriander leaves.
- Arrange all the sweet potatoes similarly. Pour a bit of hot sauce over them for an added spicy kick! Enjoy!
Nutrition Information
Yield
4Serving Size
1Amount Per Serving Calories 331Total Fat 7gSaturated Fat 1gTrans Fat 0gUnsaturated Fat 5gCholesterol 1mgSodium 314mgCarbohydrates 58gFiber 13gSugar 17gProtein 12g
Potato Tofu Savory Pancakes
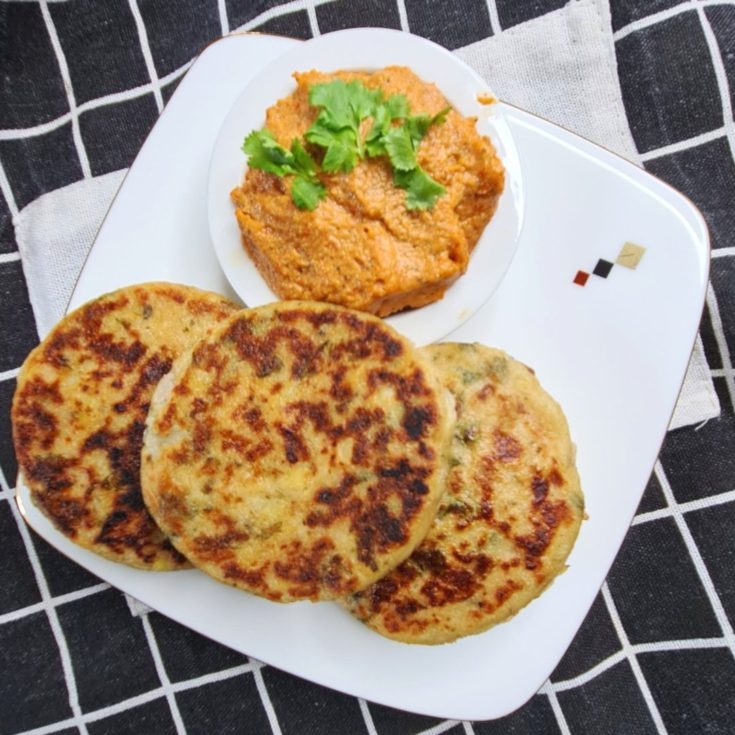
Potato Tofu Savory Pancakes
Do you struggle the the confusion of what to eat as a snack? Or maybe how to pack healthy snack boxes for your kids? This is one recipe you must try then! Because it is easy, delicious and nutritious. It is filling and will keep the kids going for the entire day. If you have an extra minute at hand in the morning then they are wonderful breakfast options too!
Ingredients
- 1 1/4 cup whole wheat/all purpose/unbleached flour
- Salt to taste
- 2 medium steamed or boiled potatoes, grated
- 1 cup extra firm tofu, crumbled or grated
- 1 small red onion, chopped
- 1 inch ginger, grated
- ¼ - ½ cup coriander leaves, chopped
- 1 - 2 green chillies, chopped (optional)
- 1½ - 2 cups water
- 1 TBSP cooking oil
Instructions
- Combine the flour and salt in a big mixing bowl. Add the rest of the ingredients except water and oil. Combine all.
- Gradually add the water till you get a consistency that is like pancake dough, which is not too thick or runny.
- Heat oil in a pan. Pour 1 ladle of pancake dough into the pan. Lower heat, cover and cook for 4 minutes.
- Flip and let cook for 3 - 4 more minutes or till both the sides turn golden brown. Serve warm with a vegan dip of choice.
Tangy Roasted Cauliflower
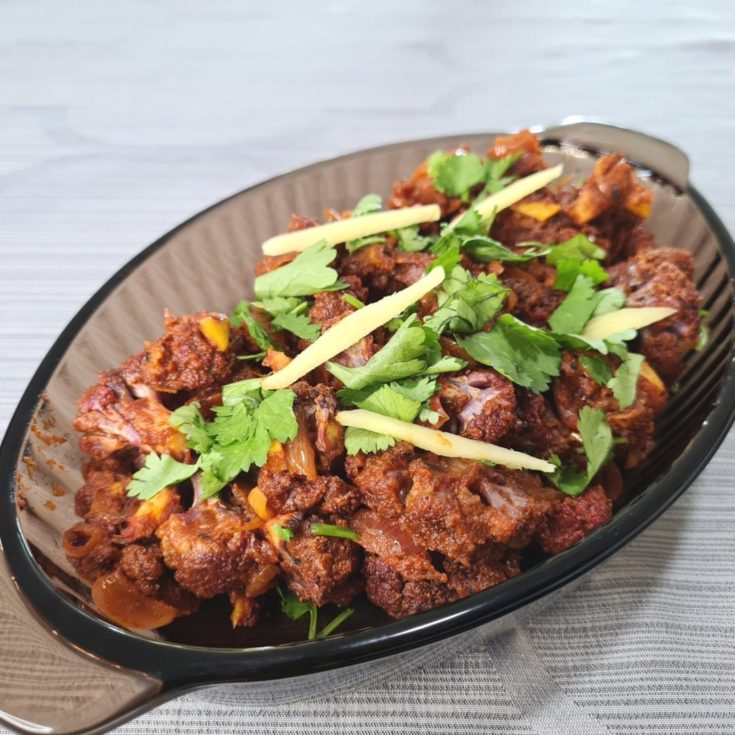
Tangy Roasted Cauliflower
Ingredients
- 1 medium-sized cauliflower, cut into florets (I used a purple cauliflower, you can use white)
- salt
- pepper
- 1 TBSP lemon juice
- 2 TBSP neutral-flavored oil divided
- 1 tsp coriander seeds
- 1 tsp cumin seeds
- 2 - 3 garlic cloves chopped
- ½ cup onions finely chopped
- 1 TBSP curry powder
- ½ cup tomato paste (add some water if the paste is too thick)
- salt, to your taste
Instructions
- Preheat the oven to 180C. In a medium-sized mixing bowl, combine the cauliflower with salt, pepper, and lemon juice. Toss!
- Add 1 TBSP oil to the cauliflower. Toss again. Roast the cauliflower in the oven for about 20 minutes.
- Heat oil in a pan. Add coriander and cumin seeds. Once they splutter, add the garlic and fry for a few seconds. Add onion and cook till they turn light brown.
- Now mix in the curry powder and combine well.
- Now add the tomato paste. Let it simmer for about 3 - 4 minutes on a low flame, till all the liquid is absorbed.
- Add the roasted cauliflower into the tomato mixture and coat the pieces well. If the mixture seems too thick, then add 1 TBSP of water. Cook till everything comes together.
- Garnish with coriander leaves and ginger sticks.
Vegan Coconut Almond Laddoos (Sugar-Free, Oil-Free)
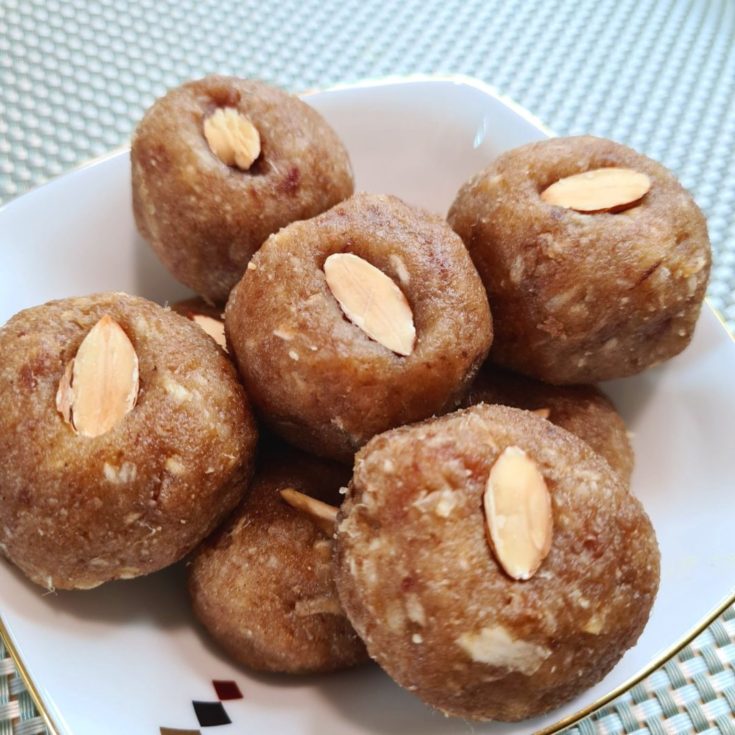
Vegan Coconut Almond Laddoos (Sugar-Free, Oil-Free)
If you are looking for a dessert that can be made within minutes, is vegan AND SUGARFREE and OILFREE? Then this is it!!!
Ingredients
- 1 cup fresh or frozen coconut
- 1/2 cup date paste (soak 12 Medjool dates without seeds in hot water for 10 minutes, blend with as little water as possible)
- 1/2 cup almond flour
- 1/2 cup coconut milk
- Sliced Almonds for garnishing
Instructions
- Heat coconut in a non-stick pan. Cook till the water evaporates.
- Add the date paste to the coconut. Mix well.
- Add the almond flour to the mixture and cook till the mixture leaves the sides of the pan.
- Add coconut milk and cook for a few minutes, till the coconut mil is absorbed completely.
- Switch off heat and let the dough cool.
- Grease your hands and make laddoos!! Garnish with sliced almonds.
Enjoy!!
Nutrition Information
Yield
6Serving Size
1Amount Per Serving Calories 279Total Fat 20gSaturated Fat 8gTrans Fat 0gUnsaturated Fat 11gCholesterol 0mgSodium 43mgCarbohydrates 22gFiber 5gSugar 14gProtein 6g
Vegan Chocolate Pudding
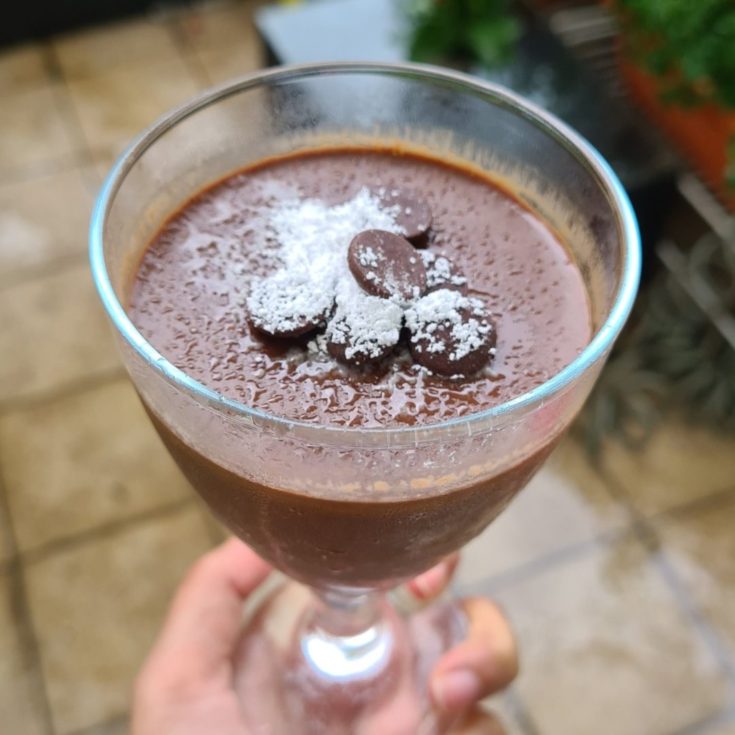
Vegan Chocolate Pudding
Being a self confessed chocoholic, when I turned vegan, I assumed that I would have to let go of all the chocolate desserts in the world. But soon, I learnt that vegan chocolate desserts were not just absolutely possible but also delicious and super easy to make!
Ingredients
- 1 cup soymilk/coconut milk
- 3 - 4 TBSP brown/coconut sugar
- 1 TBSP cocoa powder
- 2 TBSP vegan semi sweetened chocolate chips
- ½ tsp agar agar powder
- Icing Sugar and a few vegan chocolate chips for dusting to garnish
Instructions
- Combine the plant milk, sugar, cocoa powder and chocolate chips in a sauce. In a low flame, stir everything together till the sugar dissolves completely.
- Add the agar agar powder. Let it boil, while stirring continuously. Optionally, in a small bowl, you can mix the agar agar powder in 1 TBSP of warm water and then pour that mixture into the pan.
- Pour the liquid chocolate pudding into a dessert glass or bowl. Optionally, you can add some extra chocolate chips in the glass or bowl.
- Let cool to room temperature. Chill for 15 minutes.
- Dust some icing sugar on top and a few vegan chocolate chips. Serve!
Vegan Hainanese Kaya
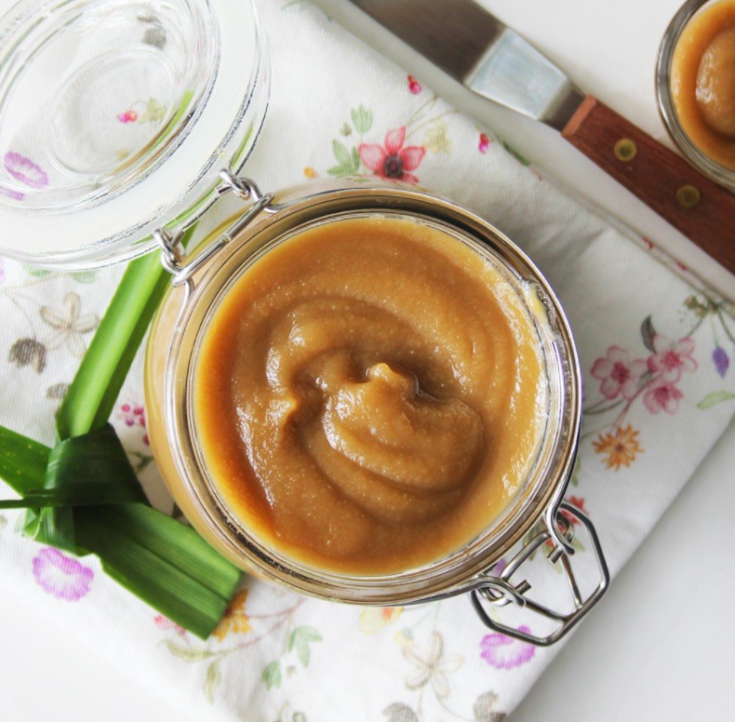
Vegan Hainanese Kaya
A breakfast must-have for Singaporeans. The veganised version is rich and refreshingly, you don't even realise it is not made from eggs.
Ingredients
- 300 g silken tofu
- 100 ml coconut cream
- 200 ml coconut milk
- Pinch of salt
- 150 g sugar
- 2 - 4 pandan leaves, knotted
- 50 g raw or brown sugar’
Instructions
- Sieve the tofu to remove excess water.
- Blend the tofu in a food processor to make a paste. Pour into a steel mixing bowl, add coconut milk and cream along with salt and white sugar. Mix to combine.
- Bring a small-sized pot of water to boil. Place the steel mixing bowl over the pot. Stir for 15 minutes on medium-low heat till thick. Strain into another mixing bowl to remove any lumps. Set the bowl over the heated pot again and add in pandan leaves.
- In another small pan, melt raw sugar over medium-low flame, stirring continuously until there are so crystals and caramel forms.
- Add caramel to tofu mixture. Cook for 20 - 30 minutes, stirring every 5 minutes until the mixture is slightly thinner than the desired consistency. The kaya will thicken in the fridge. Let cool and transfer to a clean container. Spread over the bread and enjoy!
Nutrition Information
Yield
5Serving Size
1Amount Per Serving Calories 358Total Fat 15gSaturated Fat 12gTrans Fat 0gUnsaturated Fat 2gCholesterol 0mgSodium 49mgCarbohydrates 55gFiber 0gSugar 53gProtein 5g
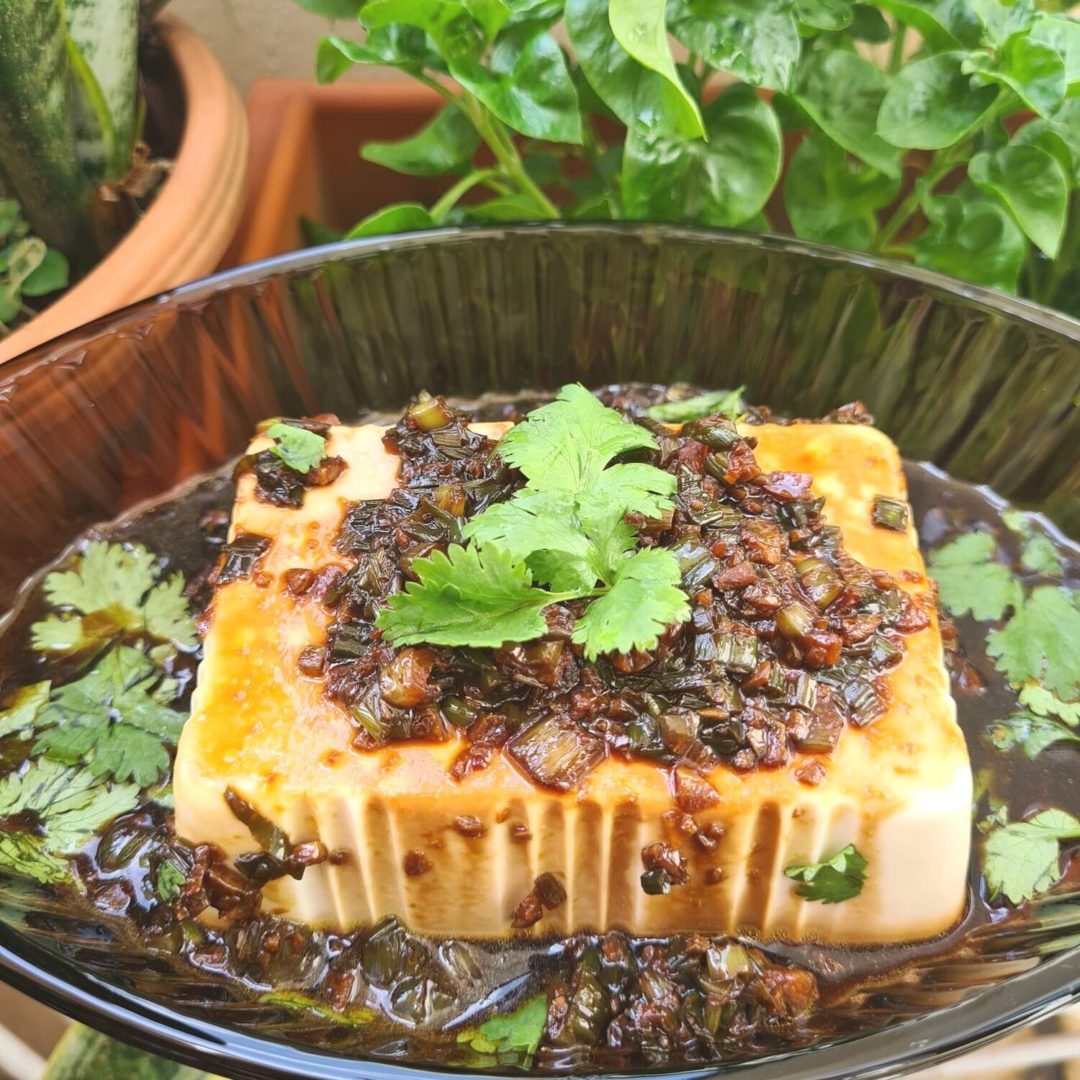
Steamed Silken Tofu in Garlic Sauce
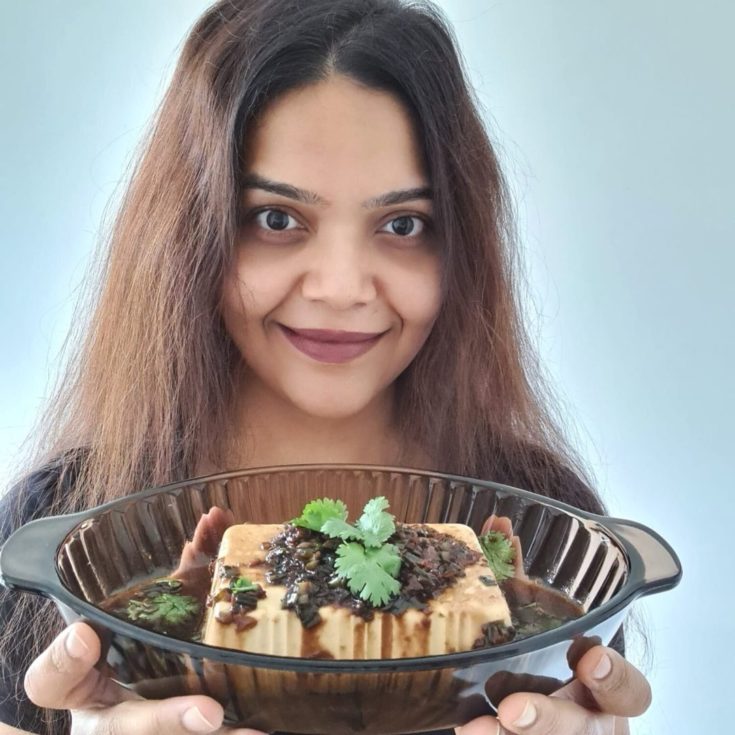
Steamed Silken Tofu in Garlic Sauce
This works great as a yummy dish with a lunch or dinner spread as well as a light snack!
Ingredients
- 300 g Silken Tofu, excess liquid removed
- 1 TBSP cooking oil
- 3 TBSP garlic minced
- 4 TBSP spring onions chopped
- 2 - 3 TBSP Soy sauce
- 1 tsp black vinegar (optional)
- Salt if soy sauce is unsalted
- 1 TBSP Sesame oil
- A few coriander leaves
Instructions
- Handle the tofu carefully. Place the slab on a steaming pan. Steam for 6 - 7 minutes. Place the tofu in the serving plate
- In a cooking pan, heat the cooking oil. Add the garlic and fry till light brown.
- Add the spring onions and cook for another minute.
- Add the soy sauce, vinegar and salt to the pan if using. Simmer for 6 - 7 minutes.
- Add the Sesame oil and mix well.
- Pour the sauce over the tofu in the serving plate. Garnish with coriander leaves.
Nutrition Information
Yield
3Serving Size
1Amount Per Serving Calories 178Total Fat 13gSaturated Fat 2gTrans Fat 0gUnsaturated Fat 11gCholesterol 0mgSodium 2256mgCarbohydrates 6gFiber 1gSugar 1gProtein 11g
Pumpkin Spice Cake
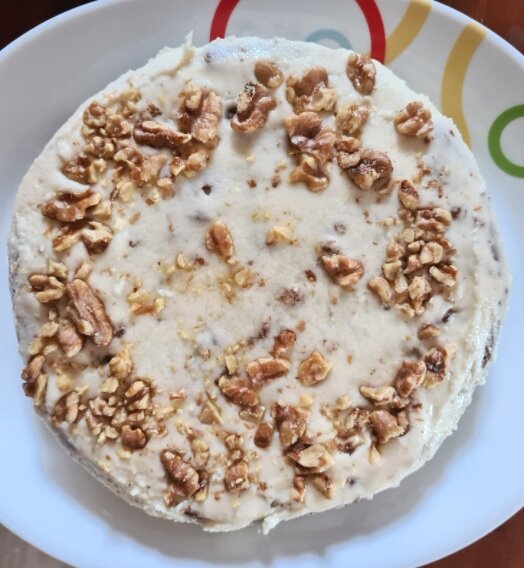
Pumpkin Spice Cake
Wonderfully moist pumpkin snack. So delicious. I will definitely make them again.
Ingredients
- 2 cups (250g) All Purpose Flour
- 1 cup (200g) Brown Sugar
- ½ cup (100g) White Sugar
- 1 tsp Baking Soda
- 1 tsp Baking Powder
- ½ tsp Salt
- 2 tsp Ground Cinnamon
- ½ tsp Ground Nutmeg
- ½ tsp Ground Cloves
- 1 and ½ cups (337g) Pumpkin Purée
- 1 tsp Vanilla Extract
- ¼ cup (60ml) Extra Virgin Olive Oil (or other vegetable oil)
- 1 Tbsp Apple Cider Vinegar
- 1 Flax Egg
For the Cinnamon Buttercream Frosting:
- 3 and ¾ cups (450g) Powdered (Confectioners) Sugar
- ½ cup (112g) Vegan Butter (at room temperature)
- 1 tsp Vanilla
- 2 Tbsp Soy Milk (or other non-dairy milk)
- 1 tsp Cinnamon
For Decoration:
- Cinnamon
- Crushed Walnuts
Instructions
- Preheat the oven to 350°F (180°C).
- Sift the flour into a mixing bowl and add the sugar, baking soda, baking powder, salt, cinnamon, nutmeg and cloves.
- Prepare your flax egg by adding 1 Tbsp ground flaxseed meal to a bowl and then adding in 3 Tbsp of Hot Water and allowing it to sit for a minute to become gloopy.
- Add the pumpkin purée, vanilla, olive oil, apple cider vinegar and flax egg to the mixing bowl and mix in very well. The batter will be thick.
- Spray two 7 inch cake tins with non-stick spray and then add a circle of parchment paper to the base of each cake tin.
- Divide the batter equally between the cake tins
- Place into the oven and bake for 30 minutes or until a toothpick inserted into the center of the cakes comes out clean.
- Transfer to a wire cooling rack and allow to cool completely before frosting.
- Prepare your frosting by adding the powdered sugar, vegan butter, vanilla and soy milk to the bowl of an electric mixer.
- Starting at slow speed, gradually increase the speed until smooth. If your frosting is too thick, add in soy milk a drop at a time until it reaches the right consistency. If it is too thin, add in more powdered sugar.
- Add the cinnamon in last and mix on low until just mixed in.
When your cakes are completely cooled, frost the top of one of the layers. Then add the other layer on top and frost the whole cake. - Sprinkle with cinnamon and add crushed walnuts to the top.
Notes
What is Flax Egg?
Roasted Cauliflower Head in Soy Curry Sauce
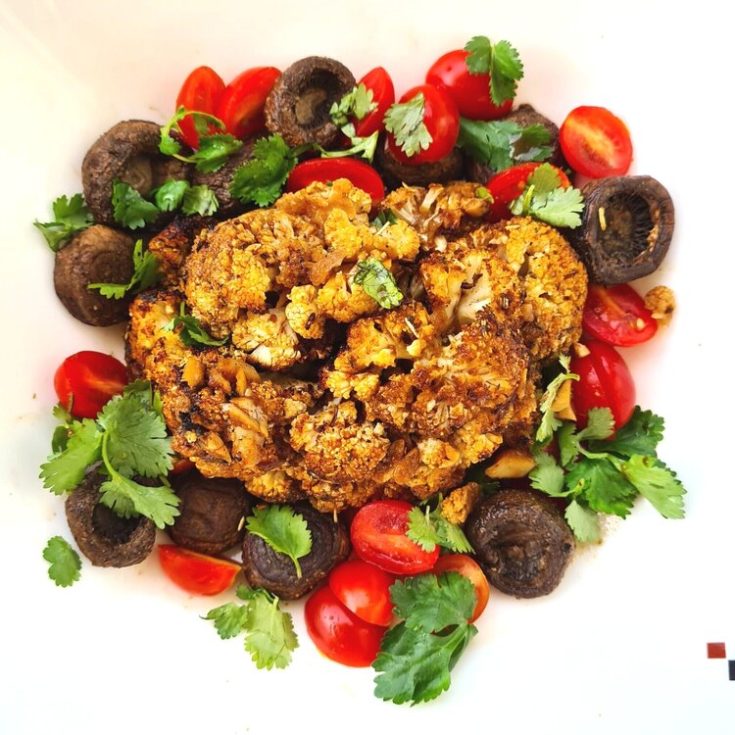
Roasted Cauliflower Head in Soy Curry Sauce
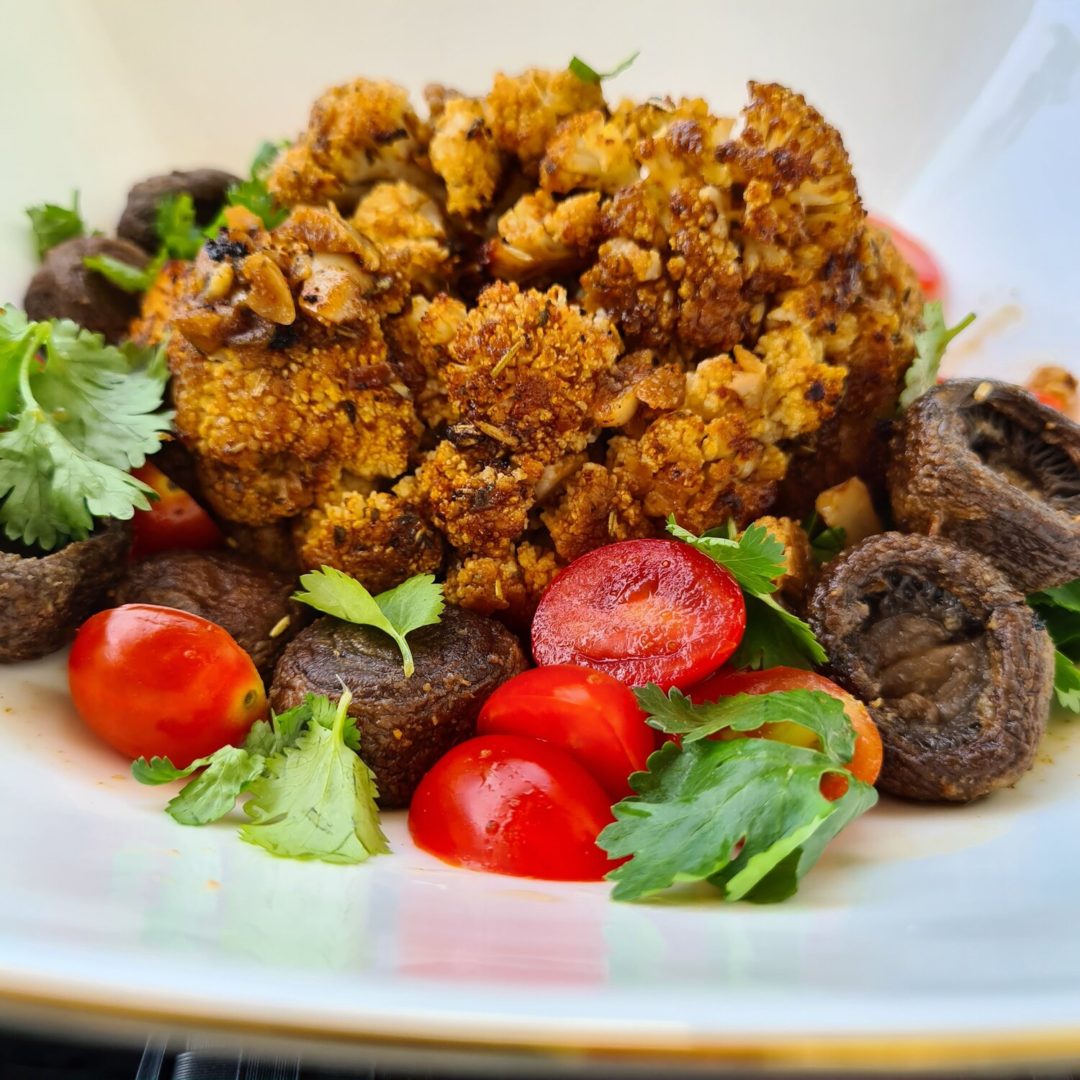
I roasted this beauty at home today!
Big, crunchy, beautiful! The dressing created a great flavour for the dish - the curry flavour came through strong. And the classic pairing of soy sauce with worcestershire sauce made it even better! The mushrooms added this lovely umami flavour to every bite. And look at how gorgeously it turned out!
Ingredients
- ONE CAULIFLOWER HEAD - duh!
Marinade
- 1 tbsp oil
- 3 cloves garlic chopped
- 1 tsp thyme
- 1½ tsp oregano
- ½ tsp ground sage
- 2½ tbsp soy sauce
- 1 tbsp vegan Worcestershire sauce
- 1 tbsp maple syrup
- ½ tsp salt
- 1 tsp black pepper
- 1 tsp smoked paprika
- 1½ tsp curry powder
Add Ins
- 1/4 tsp ground cloves
- 1/4 tsp celery seed
- 1/4 tsp rosemary
Sides
- 8 to 10 white button mushrooms stems removed
- 1/3 tsp salt
- 1/3 tsp black pepper
- 1 tsp oil
Garnish
- 2 tbsp cilantro chopped
Instructions
CRUST
- Preheat the oven to 425 degrees F (220 C).
- In a small mixing bowl, mix together all the ingredients under Marinade.
- Add 2-3 tbsp of water or vegetable broth and mix to combine the garlic and salt well.
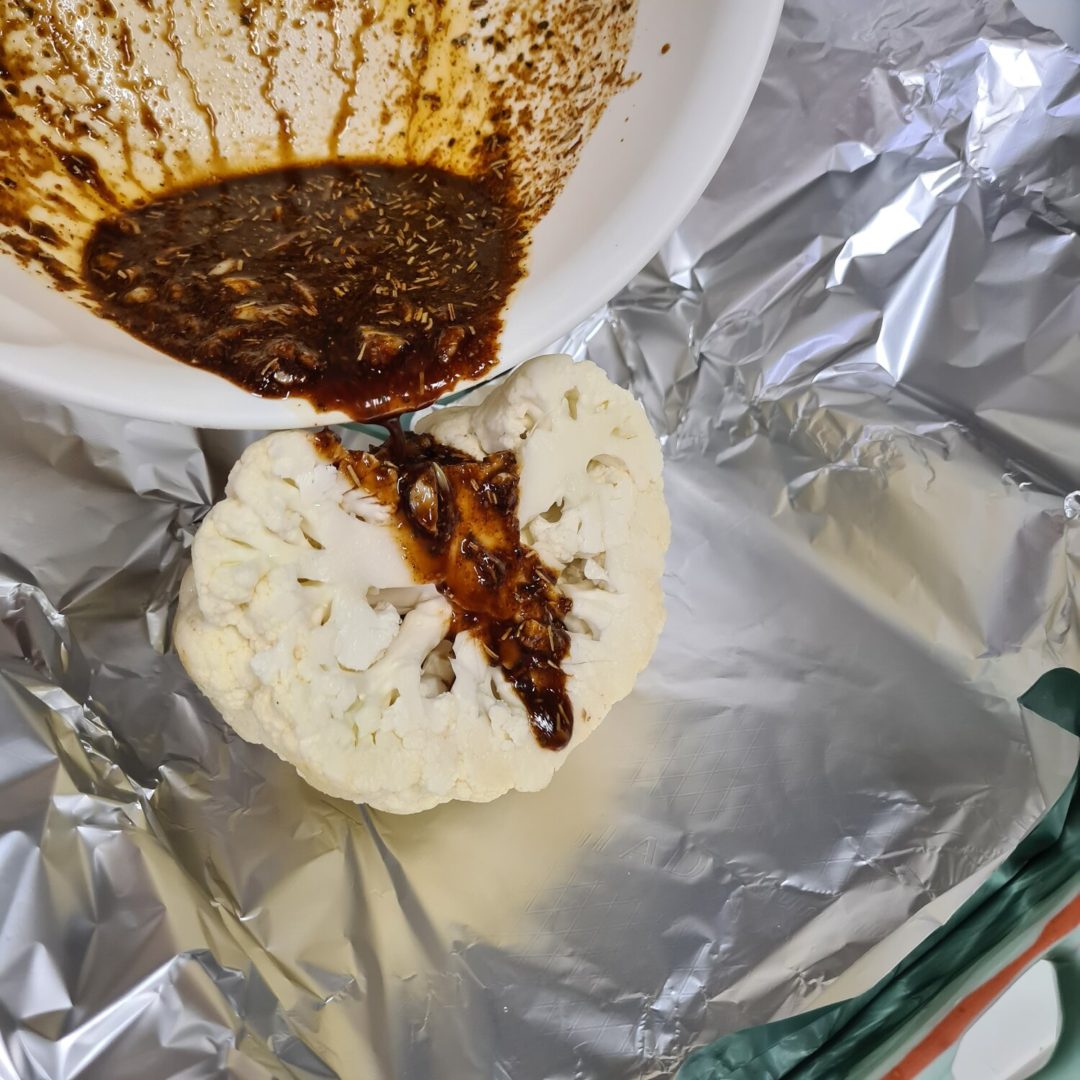
- Place a large size aluminium foil over a big baking dish. Place the cauliflower head upside down.
- Pour half of the marinade inside the overturned cauliflower and move it around to coat the indies well.
- Brush the cauliflower lightly and let it sit upside down to marinate for at least an hour (marination time is optional, but helps add more flavor).
- Sprinkle salt and pepper along with oil on the mushrooms. Transfer to a separate baking dish. Set aside.
- Once the cauliflower has marinated for an hour, and brush more marinade on the cauliflower. Cover the cauliflower with foil. It is not necessary to seal the dish completely.
- Place the covered cauliflower and the mushrooms in the oven.
- Check the doneness of the mushrooms in 20 minutes.
- If done then remove from oven. Roast the cauliflower for 30 -35 minutes(longer for larger head).
- Continue to bake uncovered for 20 to 30 mins. Use a knife to check if the cauliflower is cooked all the way through.
- When done, carefully remove the foil.
- Garnish the cauliflower with baked mushrooms and cilantro.
Notes
¾ tsp cinnamon additional optional flavor
Nutrition Information
Yield
2Serving Size
1Amount Per Serving Calories 232Total Fat 12gSaturated Fat 1gTrans Fat 0gUnsaturated Fat 10gCholesterol 0mgSodium 2196mgCarbohydrates 29gFiber 10gSugar 14gProtein 9g
Chia Banana Chocolate Chip Loaf Cake

Chia Banana Chocolate Chip Loaf Cake
A wonderful dessert-for-breakfast recipe with all good breakfast ingredients like chia seeds, banana, and yummy chocolate!
Ingredients
- 3 TBSP Chia seeds
- 8 TBSP warm water
- 1 cup mashed ripe bananas
- 1 ¾ cups almond flour
- ½ cup oat flour/rice flour (or use more almond flour)
- ¼ cup cornstarch/potato starch/arrowroot starch
- ¼ - ½ cup coconut sugar/ brown sugar
- 2 tsp cinnamon powder
- Pinch of salt
- 1 tsp baking soda
- ¼ - ½ cup dairy free chocolate chips
- 1 tsp vanilla essence
- A few TBSP of soymilk or any plant milk (if needed)
- ½ TBSP apple cider vinegar
- A handful almond flakes, optional
Instructions
- Make chia eggs - in a small bowl, mix the chia seeds and water.
- Let sit for 5 to 10 minutes till a gel is formed. This is your chia egg. (in many recipes, not all, to replace one chicken egg, you can use 1 chia egg made with 1 TBSP of chia seeds and about 3 TBSP of warm water).
- Preheat the oven to 180ºC and line a loaf pan with parchment paper or grease with oil.
- In a large mixing bowl, add the mashed bananas, almond flour, oat flour, starch, sugar, cinnamon, salt, baking soda, chocolate chips and vanilla. Mix well.
- Now add the chia egg mixture and mashed bananas and mix well.
- If the batter is too dry then add some plant milk, 1 TBSP at a time. Now, add the vinegar and mix well again.
- Immediately pour the cake batter into the greased loaf pan. Smooth the top with a spatula and sprinkle the almond flakes on top.
- Bake at 350ºF until the top of the loaf has begun to rise and crack, feeling firm to the touch, about 45 minutes. Allow the loaf to cool completely before slicing. Serve with tea/coffee or just as a breakfast on the go!
Nutrition Information
Yield
8Serving Size
1Amount Per Serving Calories 401Total Fat 20gSaturated Fat 2gTrans Fat 0gUnsaturated Fat 16gCholesterol 2mgSodium 233mgCarbohydrates 48gFiber 8gSugar 11gProtein 12g
Gluten-free Pumpkin Chia Almond Cake
Gluten-free Pumpkin Chia Almond Cake
Super food - Super good!
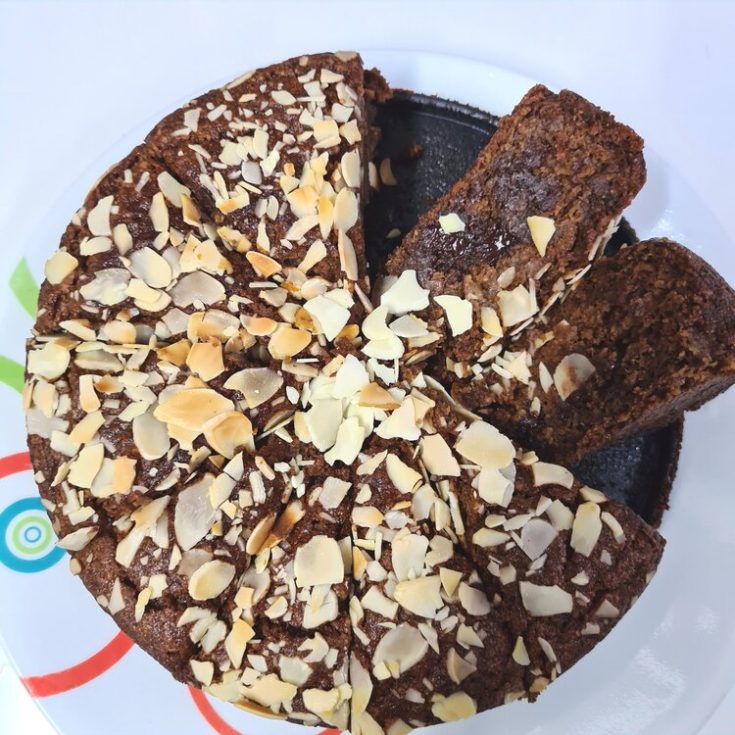
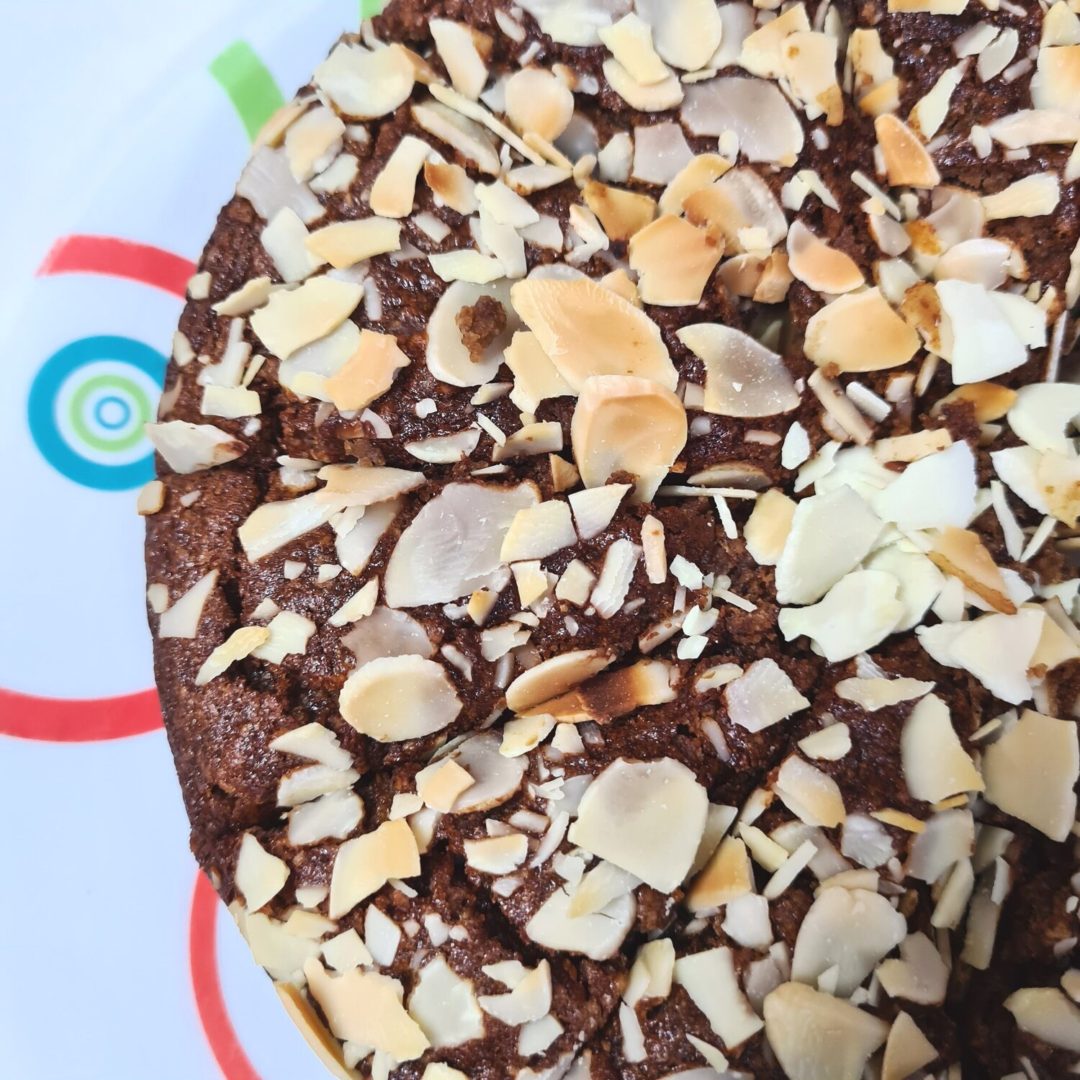
I created this recipe for the family and it turned out great! It uses pureed pumpkin and it is a great way to #hideyourveggies, it is gluten-free and is pumped with chia seeds and almonds. It’s a great weekend treat for the family!
Ingredients
WET
- 3 TBSP chia seeds
- 9 TBSP warm water
- 1 cup steamed and pureed pumpkin
- 1 tsp vanilla essence
- 2 TBSP neutral flavored oil like olive/soybean
- 1 TBSP apple cider vinegar
- 1/4 cup plant milk (more if needed)
DRY
- 1 cup almond flour
- ½ cup buckwheat/GF oat flour
- ¼ cup rice flour
- ¼ cup tapoica starch/arrowroot starch
- 1 cup coconut sugar/fine grain brown sugar
- 1 tsp baking soda
- 1½ tsp baking powder
- 2 tsp pumpkin pie spice (optional)
- 1½ tsp ground cinnamon
- ½ tsp ground nutmeg
- ½ tsp ground cloves (optional)
- ¼ cup chopped almonds or almond flakes
Instructions
- Preheat oven to 180 C. Spray a 7 inch cake pan with non-stick spray and then add a circle of parchment paper to the base of the cake pan.
- In a small mixing bowl, add the chia seeds and warm water. Mix them up and let stand for 10 minutes to form a gel.
- In a medium mixing bowl, add the rest of the wet ingredients and mix them well.
- In a big mixing bowl, mix together all the dry ingredients except chocolate chips and almond flakes.
- To the dry ingredients, add the chia seed gel and wet ingredients. Using a spatula, fold everything together, avoiding over mixing. If the batter is too dry then add 1 TBSP of plant milk at a time to achieve the desired consistency.
- Add the chocolate chips to the cake batter. Mix them in.
- Pour the batter into the prepared cake pan. Sprinkle the almond flakes on top of the batter.
- Bake for 30 - 35 minutes till a toothpick comes out clen when inserted in the centre of the cake.
- Serve warm or cold with coffee or as a dessert!
Notes
1/4 cup dairy free chocolate chips (optional)
Nutrition Information
Yield
8Serving Size
1Amount Per Serving Calories 351Total Fat 16gSaturated Fat 2gTrans Fat 0gUnsaturated Fat 13gCholesterol 1mgSodium 282mgCarbohydrates 48gFiber 6gSugar 26gProtein 8g
Read more about Ambee
If you like Ambee’s recipes, like, comment and share. Leave behind a review or a rating.
Visit Ambee’s website for more of her mouth-watering recipes
Follow Ambee on IG
AMBEE🌱 Plant-based Influencer
Cause
🐢Social Entrepreneur Speaker Educator
🌿Vegan Parenting Food Fitness Lifestyle
🍈Food Sustainability & Plant based Nutrition Certified
🇸🇬SG
