What does a vegan eat for dessert?
Meatless Movement asked food bloggers we love, to share their insanely good and indulgent vegan desserts with our readers. Here are their top picks. Be blown away by their recommendations. From pies to puddings and donuts, there’s something sweet for everyone.
- Vegan Mango Panna Cotta & Tropical Coconut Ice Cream
- PB & Chocolate Overnight oat Donut
- Tiramisu (Vegan & Gluten Free)
- Raw Blueberry Lemon Cake
- Virgin colada vegan pudding
- Spirulina and Matcha Crepes
- Vegan Citrus Rocky Roads
- Physalis Salted Caramel & Chocolate Cake
- Peanut Butter Bliss Balls
- Mexican Vegan Concha
- Apple Pie Crumble
- Raw Lime Ginger Pie
- Chocolate Protein Banana Bread
- Oatly Triple Chocolate Eclair
- Matcha Pancakes
- Lotus Biscoff Biscuits
- Middle Eastern Dessert🍥 – Muhallabia
- Cotton Candy 🥰🌱
Check out our favourite bloggers and follow them for more meatless recipes and mouthwatering photos.
Vegan Mango Panna Cotta & Tropical Coconut Ice Cream
Vegan Mango Panna Cotta & Tropical Coconut Ice Cream
🥳 1st dedicated meat alternative restaurant in a Singapore hotel, a dining experience that’ll definitely change ur perception of vegetarian & vegan food! Featuring brands like Impossible Foods, OnlyEg, Arlene, Green Rebel Foods, KARANA & more!
🌿 One thing that stands out is that they 𝒈𝒓𝒐𝒘 𝒕𝒉𝒆𝒊𝒓 𝒐𝒘𝒏 𝒉𝒆𝒓𝒃𝒔 like mint, rosemary, etc in their outdoor mini garden & indoor mini hydroponics to use in their dishes
Had the opportunity to get a taste of some of their many delicious & interesting dishes during their pre-opening tasting.
Starters:
🐟 Flaked Tuna Nicoise Salad (Vegan)
Confit Provencal Vegetables, Kalamata Olive Tapenade, @onlyeg.sg Shredded Egg, Oven Roasted Potato, Piquillo Pepper Dressing
This is plated so beautifully😍 & all the ingredients complements one another very well. 𝑭𝒍𝒂𝒌𝒚 𝒕𝒖𝒏𝒂 𝒕𝒆𝒙𝒕𝒖𝒓𝒆 without the strong fishy taste. Would say its quite similar
🧆 Middle Eastern Spiced Kebab & Falafel @arlene.world
Kebab, Falafel & Kibbeh with Hummus, Beetroot Dip, Broiled Eggplant & Warm Pita Bread
Love Middle Eastern cuisine so this is one of my favourite especially the kibbeh!! 𝑭𝒂𝒍𝒂𝒇𝒆𝒍 𝒊𝒔 𝒇𝒓𝒊𝒆𝒅 𝒕𝒐 𝒑𝒆𝒓𝒇𝒆𝒄𝒕𝒊𝒐𝒏, so crispy outside. 💯
🐠 Thai Fish Cake & Roasted Sesame Soba Salad (Vegan)
Shredded Raw Vegetables, Citrius Light Soy Dressing
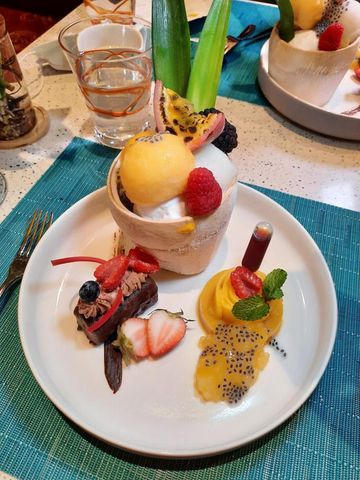
🥭 Mango Panna Cotta (Vegan)
Vanilla Sago, Freash Basil Seed, Toasted Pistachio, Passionfruit Sorbet
This is so cute, the gula melaka is in a “tube” so can squeeze the amt depending on the sweetness level u want
🥥 Tropical Coconut Delight (Vegan)
Passionfruit, Coconut & Lime Sorbet, Tropical Fruit, Basil Seed
𝑪𝒐𝒐𝒍 & 𝒓𝒆𝒇𝒓𝒆𝒔𝒉𝒊𝒏𝒈 dessert, coconut sorbet is 𝒕𝒉𝒊𝒄𝒌 & 𝒄𝒓𝒆𝒂𝒎𝒚 🍨
Shangri-La Rasa Sentosa, Singapore
PB & Chocolate Overnight oat Donut

PB & Chocolate Overnight oat Donut
PB & Chocolate Overnight oat Donut
healthy high protein and vegan ♥️
Ingredients
- ½ cup oats (60g)
- ¾ cup plant milk
- 1 tsp maca powder
Microwave on high for 1.5-2 mins Stir in:
- 1 serv Vegan Protein (@macr0mike peanut butter protein)
- 1 tsp chia seeds
- 1 tbs peanut butter / 2 tbs PB powder
- ❣️Water to combine
Instructions
Scoop into cling film and make a roll, refrigerate overnight, pop it onto a plate, shape it into a 🍩 ,drizzle peanut butter & choc syrup for the icing 🥜😌 add toppings, serve and ENJOYYY ✨💋
Nutrition Information
Yield
1Serving Size
1Amount Per Serving Calories 2513Total Fat 94gSaturated Fat 44gTrans Fat 2gUnsaturated Fat 42gCholesterol 239mgSodium 1678mgCarbohydrates 270gFiber 22gSugar 153gProtein 155g
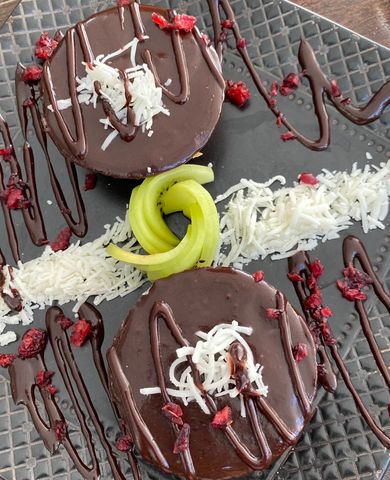
Tiramisu (Vegan & Gluten Free)
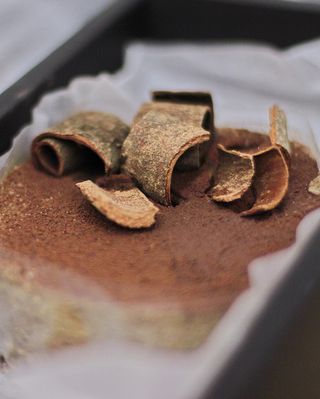
Tiramisu
disclaimer: this tiramisu was gifted to me, however, all of the comments are my own and have not been swayed
🤩 This was a delightful dessert! (Please forgive my lack of 🍰 terminology going forward)
Overall, the tiramisu wasn’t too sweet, but still satisfied my sweet craving~
The coffee flavour wasn’t as prominent and the cream wasn’t as smooth as I remember it being in the non-vegan version, however, this didn’t take away from the dessert!
The tiramisu had a somewhat healthy kick to it – you’re eating dessert, you know it’s dessert, but it doesn’t feel like an artificial which could give you a sugar overdose.
⭐️ Rating: 8.5/10
Mysterious’s @Cali.oo stall had other desserts listed which I would definitely want to try sometime in the future!
I’m very satisfied and thankful for the (what became my ‘birthday’) cake 🫶🏼
Overall rating: 8.5/10
Would I have this again?
Definitely! I want give a few of their menu items a go 😀
Homemade Vegan Chocolate Cake with Coconut Caramel Cream (mixed with Coconut Sap Sugar), Raspberries and Strawberries 🍓.


Calioo
Raw Blueberry Lemon Cake
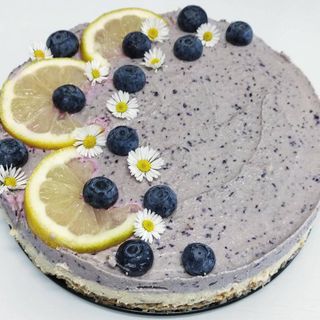
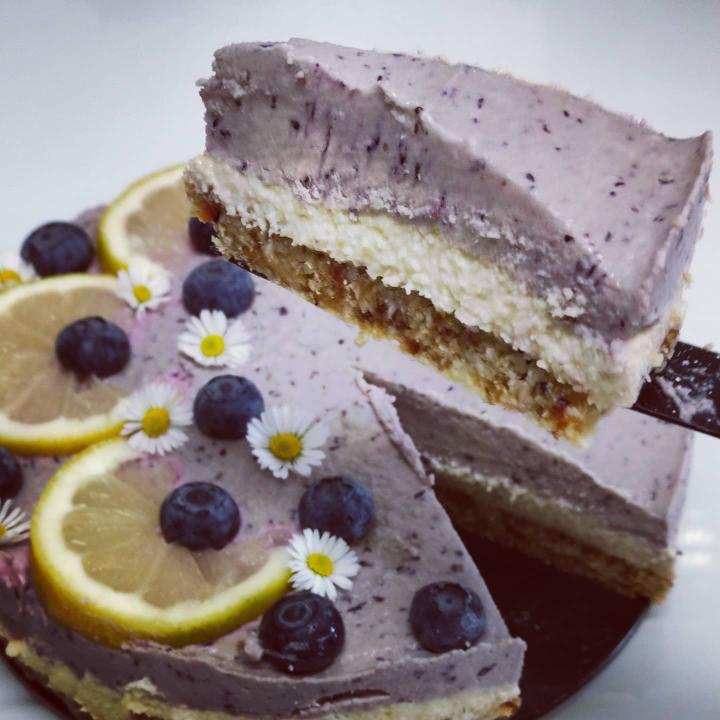
𝐑𝐚𝐰 𝐛𝐥𝐮𝐞𝐛𝐞𝐫𝐫𝐲 𝐥𝐞𝐦𝐨𝐧 𝐜𝐚𝐤𝐞
Will you share it? 💖 Stay healthy!
𝐑𝐚𝐰 𝐛𝐥𝐮𝐞𝐛𝐞𝐫𝐫𝐲 𝐥𝐞𝐦𝐨𝐧 𝐜𝐚𝐤𝐞
𝐑𝐚𝐰 𝐛𝐥𝐮𝐞𝐛𝐞𝐫𝐫𝐲 𝐥𝐞𝐦𝐨𝐧 𝐜𝐚𝐤𝐞! Healthy, delicious and easy. Check it out:
Ingredients
Base
- 1 cup dessicated coconut
- 1 cup nuts (I used almonds)
- 1 cup dates (pitted; if too hard to process soak in water a few hours before)
- 1 tsp vanilla
- ½ lemon zest
Filling
- 3 cups cashews (soak in water the day before)
- 1 cup full-fat coconut milk
- ⅓ cup coconut oil (or butter)
- ⅓ cup maple or other syrup
- 1 lemon juice and zest
- 1 tsp vanilla extract
- 1 cup or more of blueberries (add separately if you want to create layers)
Instructions
- Process all Base ingredients
- Blend all Filling ingredients
- Keep in the fridge or freezer and enjoy!!
Virgin colada vegan pudding
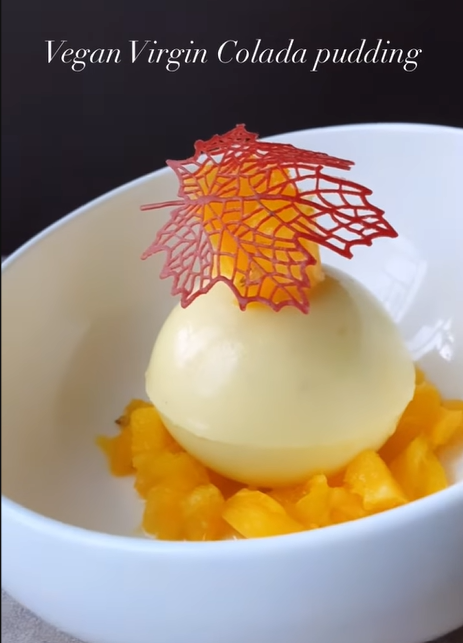
Virgin colada vegan pudding
Summer is the season for pineapples, and pineapples grown in Taiwan is very famous because they’re sweet and very juicy.
Inspired by the drink piña colada, I am making a vegan version of pudding out of the same ingredients.
It came out to be a nice dessert, with creamy texture from the coconut, freshness from the pineapple & just a right amount of sweetness, which is great for the summer.
Virgin Colada’s vegan pudding
Summer is the season for pineapples, and pineapples grown in Taiwan is very famous because they’re sweet and very juicy.
Inspired by the drink piña colada, I am making a vegan version of pudding out of the same ingredients.
It came out to be a nice dessert, with creamy texture from the coconut, freshness from the pineapple & just a right amount of sweetness, which is great for the summer.
Ingredients
- 1 pineapple, peeled and diced, (save some for garnish)
- 200 ml coconut cream
- 300 ml water
- 3 tablespoons sugar
- 4g powder Agar agar
- 50ml water to dissolve agar agar
Instructions
- Blend the pineapple and water together, get 600ml of fresh pineapple juice.
- Heat up the coconut cream with sugar, until the sugar is dissolved
- Mix the agar agar with water then add into the coconut milk.
- Add the pineapple juice.
- Taste the mixture and adjust sweetness by adding more sugar, if needed
- Pour the pineapple mixture into molds, or serving containers. *Add some finely diced pineapple in the mold to give extra texture and juiciness.
- Let chill for 1 hour. Enjoy!
Spirulina and Matcha Crepes
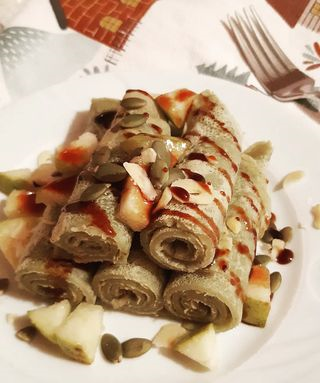
Spirulina and Matcha Crepes

They are easy to make, healthy and approved by kiddos – that is always a winner.
Spirulina and matcha crepes
They are easy to make and super delicious. Super kid approved☺ That's always a winner. Enjoy!
Ingredients
- 1.5 cups all-purpose flour
- 1 tbsp cornstarch
- 1 tsp ground flaxseed
- 1 tsp spirulina powder
- 1 tsp matcha
- ¼ tsp salt
- 1 cup mylk (oat, soy, almond)
- 1 cup water
- 1 packet vanilla
Instructions
- Put all of the ingredients in a bowl and use a whisk to blend the ingredients until smooth.
- ️Very lightly grease a pan with oil over medium heat. I use coconut oil.
- ️Pour 1 ladle of the crepe mixture into the pan and twirl the pan so the batter covers the surace evenly.
- Cook the crepe for about 2 min, or until the edges start to slightly lift. Then use a spatula to flip the crepe to the other side.
- Remove from the pan onto a large plate. Wait a minute for the crepe to cool, then roll.
- You can leave your crepes plain or add a filling before you roll them.
Filling ideas: jam, marmelade, vegan nutella, fruit.
Notes
They are easy to make, healthy and approved by kiddos - that is always a winner.
Nutrition Information
Yield
5Serving Size
1Amount Per Serving Calories 149Total Fat 1gSaturated Fat 0gTrans Fat 0gUnsaturated Fat 0gCholesterol 0mgSodium 124mgCarbohydrates 30gFiber 1gSugar 0gProtein 4g
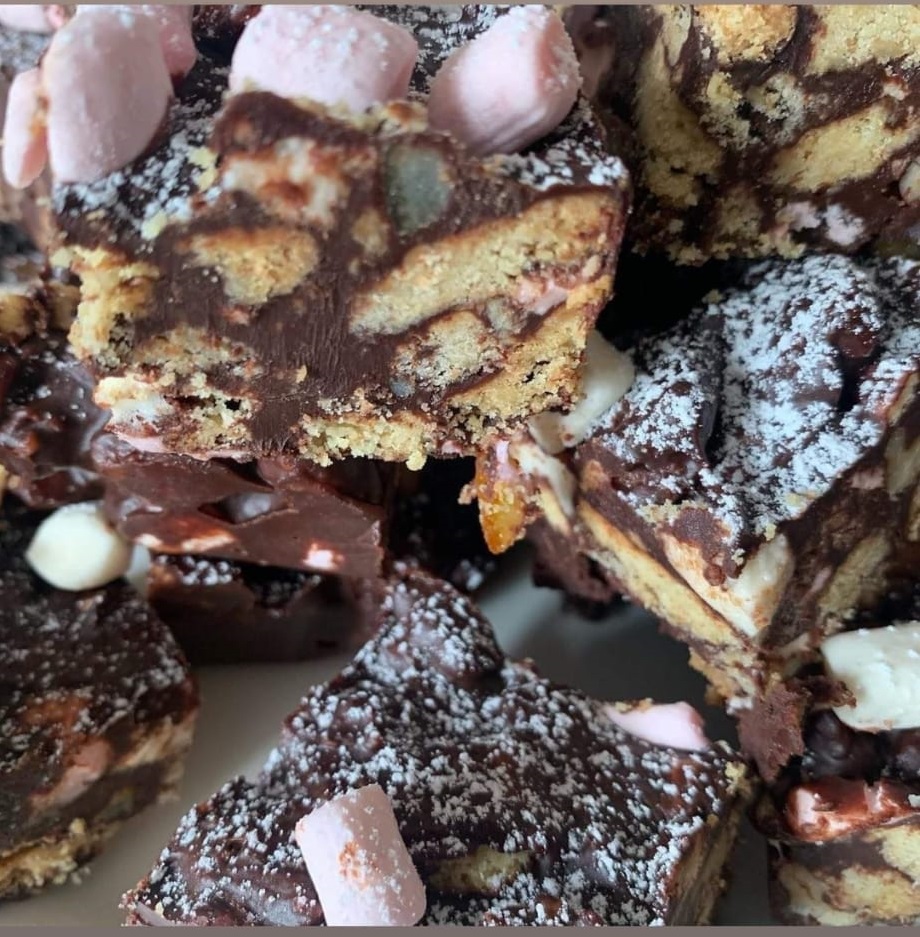
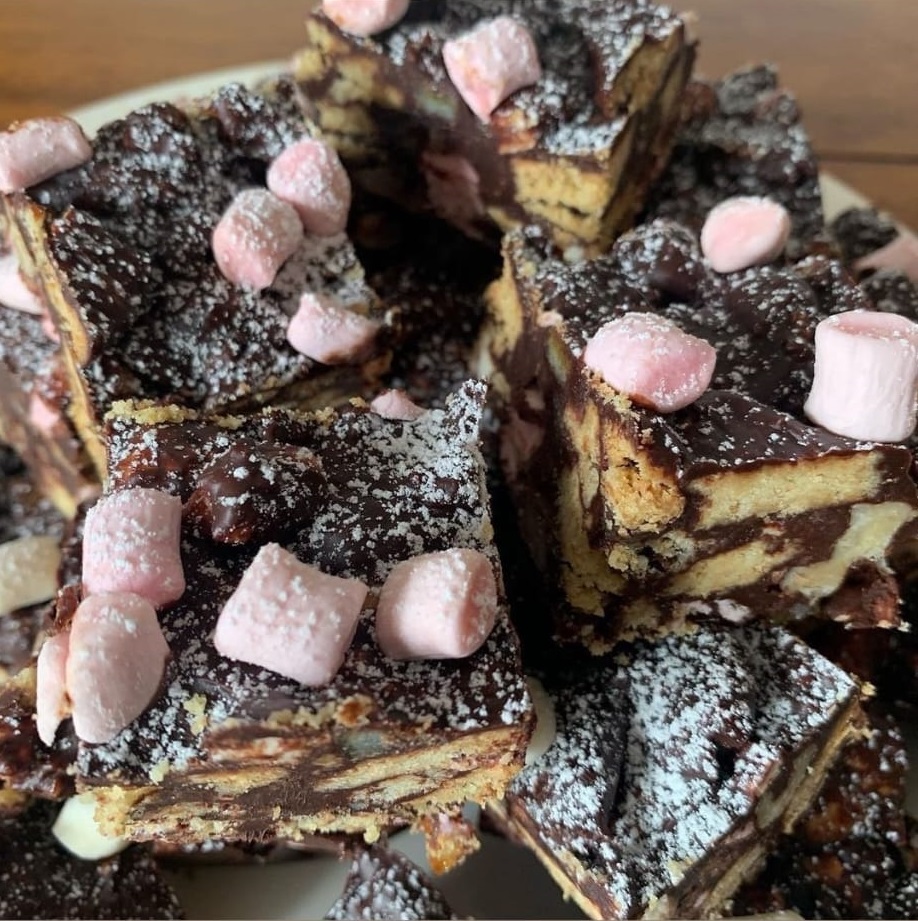
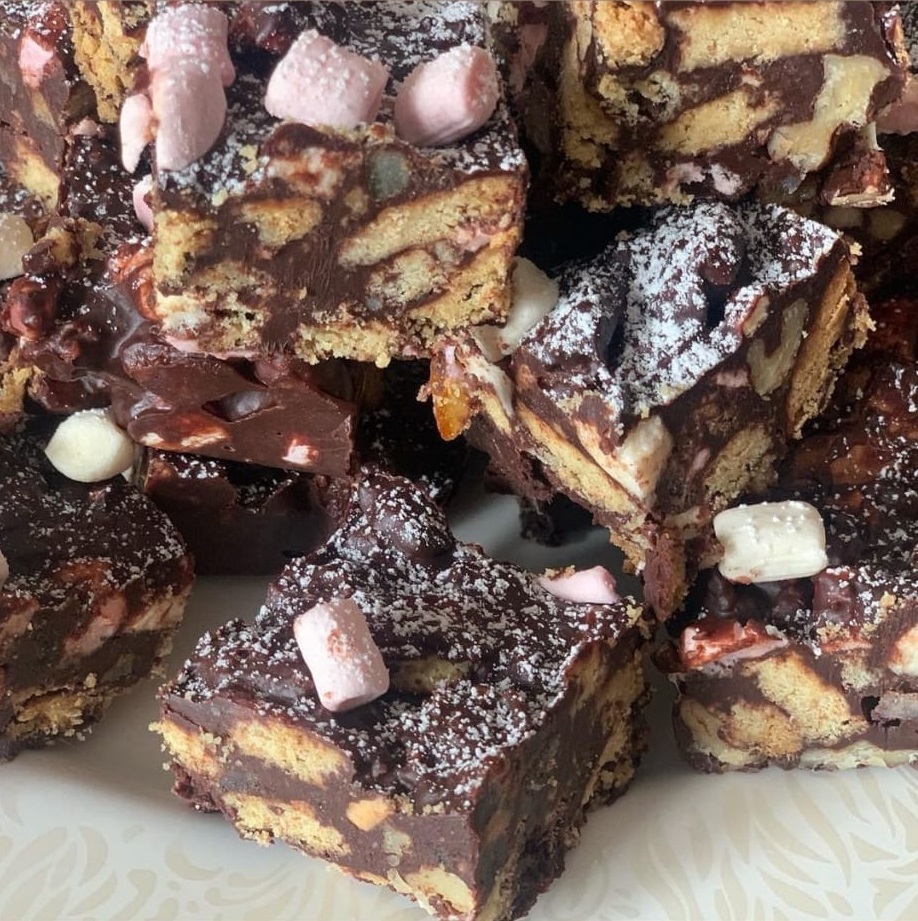
Vegan Citrus Rocky Roads
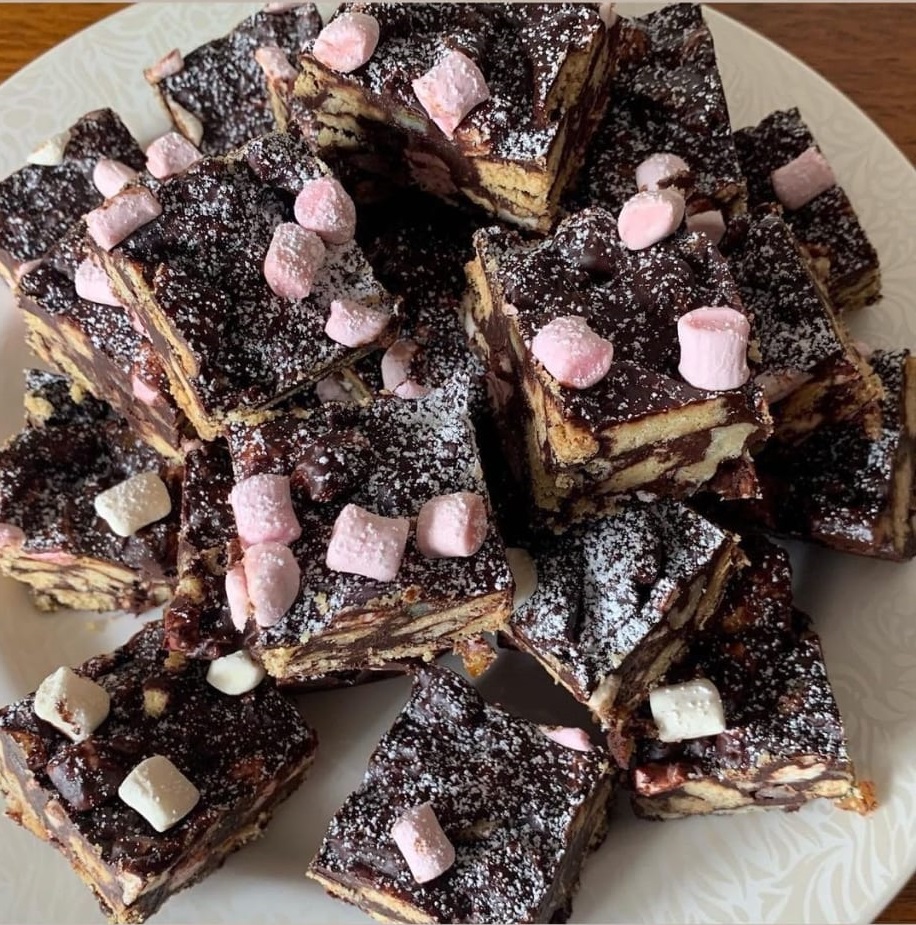
Vegan Citrus Rocky Roads
I know I’m biased but these are the best rocky roads I’ve ever had in my life ❤️ They’re based on a slightly adapted recipe by the wonderful @georgiascakes
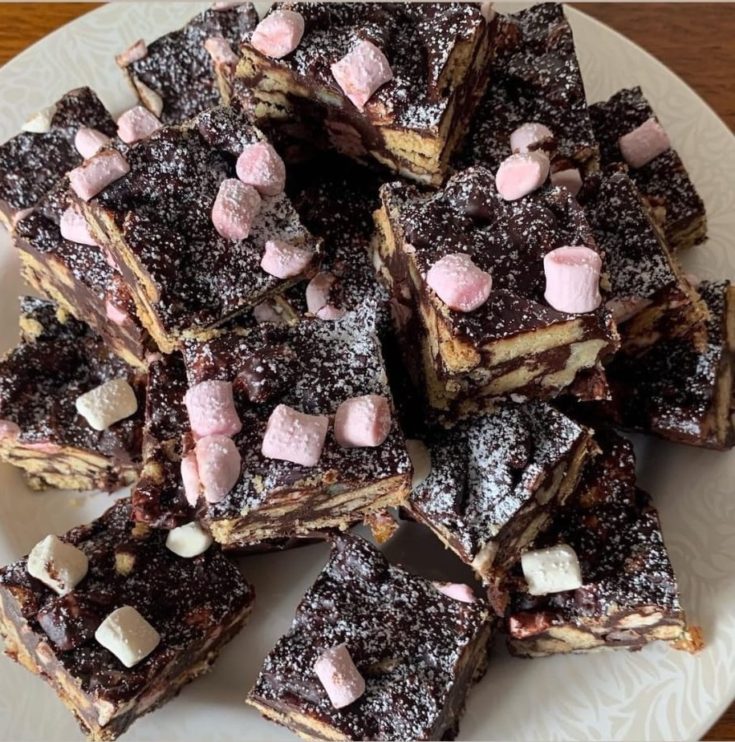
Vegan Rocky Roads
I know I’m biased but these are the best rocky roads I’ve ever had in my life ❤️ They’re based on a slightly adapted recipe by the wonderful @georgiascakes
🌱
Ingredients
- 🌱 2 bars of @tonyschocolonely_uk_ire vegan chocolate (we used lemony caramel and almond sea salt - both available from @ocadouk)
- 🌱 150g melted vegan butter - @naturli
- 🌱 60g @lylesgoldensyrup
- 🌱 240g vegan digestives - @dovesfarm
- 🌱 120g vegan marshmallows - @freefromfellows -
- I’m totally addicted to their marshmallows 😍😍
- 🌱 60g candied peel
- 🌱 50g walnuts (broken up)
Instructions
- Melt butter, syrup and chocolate together until you get a silky mixture.
- Break up biscuits and add to mixture.
- Add marshmallows, peel and walnuts.
- Spoon into a greased and lined dish (ours was about 11” x 5”) and sprinkle with more marshmallows.
- Put in the fridge to cool and harden.
- Once cooled, sprinkle with @tateandlylesugars icing sugar, cut into squares. We got 24 squares from our mixture.
Nutrition Information
Yield
8Serving Size
1Amount Per Serving Calories 391Total Fat 27gSaturated Fat 7gTrans Fat 3gUnsaturated Fat 19gCholesterol 4mgSodium 96mgCarbohydrates 36gFiber 1gSugar 23gProtein 3g
Physalis Salted Caramel & Chocolate Cake
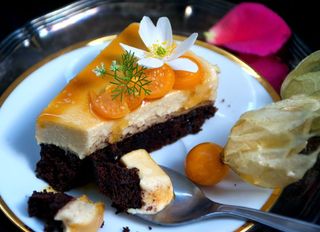
Physalis Salted Caramel & Chocolate Cake
Physalis Salted Caramel & Chocolate Cake
I did some research on typical flavor pairings for physalis and found it to be commonly served dipped in chocolate. No way that would work (they taste like tomatoes! 🍅), I thought. But sure enough, after popping a square of dark chocolate and half a physalis in my mouth: I was won over. The physalis is acidic, tart and sweet at the same time which pairs brilliantly with the richness and bitterness of chocolate. I wanted to have a very rounded out flavor, the chocolate-physalis combo was lacking a certain sweet creaminess, also a touch of salt. Logically, thats where the salted caramel cheesecake layer comes in 😉
Ingredients
For the chocolate sponge
- 140g oat milk (sub with other plant milks)
- 1 tsp vinegar
- 35g oil
- 25g melted chocolate
- 100g vegan yogurt
- 100g flour
- 80g sugar
- 40g cocoa powder
- 1 tsp espresso powder *(optional)
- ½ tsp baking soda
- ¼ tsp baking powder
- pinch of salt
For the caramel
- 100g sugar
- 20g water
- 40g vegan butter
- 60g vegan milk
- 30g soy sauce (sub with salt to taste)
For the cheesecake
- 200g cashews, soaked over night or in boiling water for 1 hour
- 80g coconut oil
- 53g vegan white chocolate
- 250g vegan yogurt*
- 2 Tbs lemon juice
- the caramel sauce from above (reserve a few tablespoons of it to top with)
- physalis fruit to top with
Instructions
- Grease a loaf pan and preheat the oven to 180°C. Make the sponge by combining the wet ingredients in a large bowl, then combining the dry in a medium bowl. Dump the dry ingredients into the wet and whisk just until a smooth batter forms. Bake it for 30 minutes or until it springs back to the touch.
- Cool the cake and make the caramel in the meantime.
- Combine the sugar and water in a medium sized saucepan, cook on medium heat until the sugar begins to turn amber in color. Don't stir because that can cause the sugar to crystallize. Once it is amber, remove from the heat and carefully stir in the butter (it was sputter and bubble). Then, stir in the milk and soy sauce until smooth. Set aside to cool.
- To make the cheesecake, blend everything together until smooth and creamy.
- Pour the cheesecake over the cooled chocolate cake. Top with the remaining caramel sauce and the physalis.
Nutrition Information
Yield
12Serving Size
1Amount Per Serving Calories 386Total Fat 23gSaturated Fat 9gTrans Fat 1gUnsaturated Fat 12gCholesterol 4mgSodium 360mgCarbohydrates 41gFiber 2gSugar 26gProtein 7g
Peanut Butter Bliss Balls
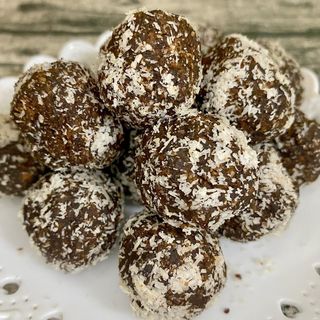
Peanut Butter Bliss Balls
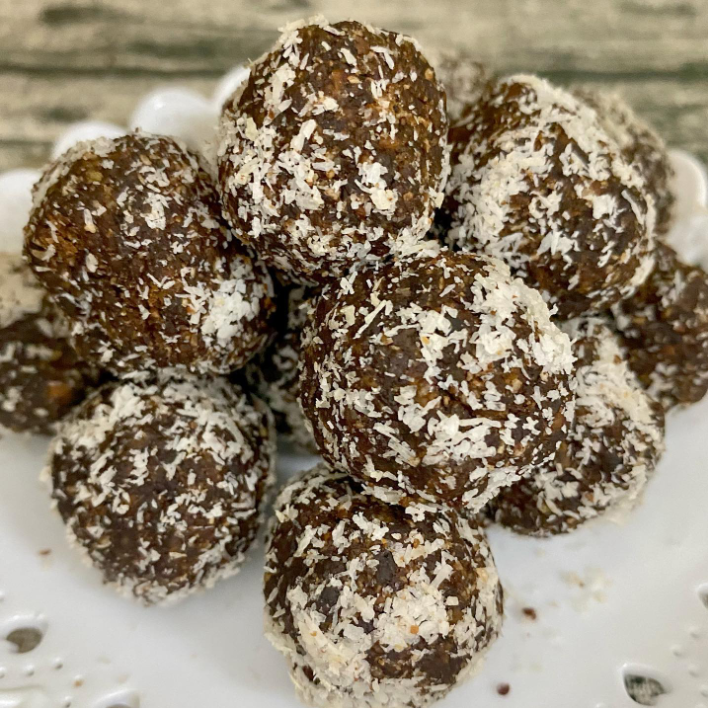
Peanut Butter Bliss Balls
These bliss balls are perfect for pre-workout snack, breakfast-on-the-go, or simply a sweet treat.
They’re packed with healthy fats, fiber, protein, and carbohydrates —- everything you need to fuel your body. What more could you ask for? 😉
Ingredients
- 🌱1/2 cup chickpea flour
- 🌱1/4 cup coconut flour
- 🌱1/8 cup cacao powder
- 🌱1/8 cup agave syrup
- 🌱4 tbsp peanut butter
- 🌱1/4 tsp salt (if you’re using salted peanut butter, you may omit this)
Optional:
- 🌱cacao nibs
- 🌱desiccated coconut
Instructions
Roll tablespoonfuls of the mixture into snack-sized balls
Nutrition Information
Yield
8Serving Size
1Amount Per Serving Calories 1632Total Fat 33gSaturated Fat 11gTrans Fat 0gUnsaturated Fat 7gCholesterol 0mgSodium 1291mgCarbohydrates 292gFiber 33gSugar 167gProtein 42g
Mexican Vegan Concha
Mexican Vegan Concha
Mexican Vegan Concha
Ingredients
- DOUGH
- ½ cup lukewarm warm water
- ⅓ cup Bob’s Red Mill organic sugar, divided*
- 2¼ teaspoons (1 packet) Bob’s Red Mill active dry yeast
- ½ cup aquafaba (liquid from a can of chickpeas)
- ¼ teaspoon cream of tartar
- ½ cup vegan buttery sticks, melted (we used Earth Balance)
- 1 tablespoon vinegar
- 4 to 4½ cups Bob’s Red Mill all-purpose flour
- 2 teaspoons baking soda
- 1 teaspoon salt
- ½ teaspoon ground cinnamon
- ½ cup vegan buttery sticks, softened but not melted (we used Earth Balance)
- ⅔ cup Bob’s Red Mill organic sugar
- 1 cup Bob’s Red Mill all-purpose flour
- 1½ teaspoon cocoa powder
- 1 teaspoon ground cinnamon
- 1 teaspoon vanilla extract
- ½ cup vegan buttery sticks, softened but not melted (we used Earth Balance)
- ⅔ cup Bob’s Red Mill organic sugar
- 1 cup Bob’s Red Mill all-purpose flour
- 1 teaspoon vanilla extract
- 1 teaspoon turmeric powder
- ¼ teaspoon ground cinnamon
Instructions
- In a large bowl, stir together the lukewarm water, 1 tablespoon of the 1/3 cup organic cane sugar, and active dry yeast
- Set this mixture aside and allow it to activate for 10-15 minutes.
In the meantime, whip the aquafaba. - Grab a medium bowl and add in the aquafaba along with the cream of tartar.
- Mix using a hand mixer or a standing mixer, whip it on high for 5-10 minutes or until it is light and fluffy. Set aside.
- Once the yeast has activated, add in the remaining sugar along with the melted vegan butter, and vinegar.
- Gently mix that all together until uniform. Set aside.
- In another large bowl, mix together 4 cups of all-purpose flour, baking soda, salt, and cinnamon.
- Slowly begin to pour the dry mixture into the wet mixture, mixing as you go so that it is easier to combine, and stop when there is about 1 cup of dry mixture remaining.
- Gently fold in the aquafaba, scraping down the bowl as needed to get every last bit.
- Add in the remaining dry mixture in to form a soft dough. If the mixture is still moist, add in additional flour, 2 tablespoons at a time (we found this unecessary).
- Once it becomes a soft and supple dough, transfer it to a floured work surface and knead for 10 minutes, or until smooth.
- Place the dough into a large greased bowl and flip it once in there to make sure it is coated and moist.
- Cover with a clean dish towel and set it in a warm place to rise for 2 hours.
- When there are about 20 minutes left for rising time, prepare the toppings. Keep in mind that the topping ingredients are each for all 12 conchas.
- If you would like to use both colors, simply half the topping ingredients.In a medium bowl, cream together the softened butter and sugar using a hand mixer.
- Once creamed, stir in the flour and vanilla extract by hand. Split the dough-like mixture into 2 part and separate them into two smaller bowls.
- In one bowl, add in all of the ingredients for the chocolate topping, and in the other add everything for the turmeric topping.
- Using a spoon, mix the dough until everything is well combined. You will need to go in with your hands at the end to make sure they are well coated and the colors are well distributed and uniform throughout (you don’t want spots of white). Set aside.
- Line 2 large baking sheets with parchment paper or silicone baking mats.
- Punch down rising dough and divide it into 12 pieces. We used a scale to be sure they were all even.
- Roll each dough into smooth balls by tucking the dough under itself.
- Place 6 dough balls on each baking sheet, spacing them out as they will continue to rise.
- Divide each topping into 6 pieces. Grab a piece of parchment or wax paper and fold it in half. The folded piece should be a little bit larger than the width of the concha dough.
- Roll one of topping pieces into a small ball and place it in between the two pieces of parchment paper. using a rolling pin or a jar (we preferred the jar as it was easier) roll the ball out into a circle as wide as the concha dough balls.
- Place the round on top of a dough ball and gently press it in so that it is sticking to the dough.
- Continue with the rest of the topping dough. We recommend you use two sets of parchment paper to prevent the colors from mixing.
- Using a sharp knife or a concha mold, cut grooves into topping to resemble the grooves on a scallop shell.
- It may be a little bit difficult at first but you will get the hang of it!
Cover the rolls with two clean towels and allow them to rise in a warm place for another hour. - Preheat the oven to 375°F when the rolls are almost done rising. Once risen, bake the conchas for 13-15 minutes, or until golden brown.
- Remove from sheets and cool completely on wire racks before digging in.
Nutrition Information
Yield
2Serving Size
1Amount Per Serving Calories 6281Total Fat 43gSaturated Fat 14gTrans Fat 0gUnsaturated Fat 22gCholesterol 1mgSodium 2820mgCarbohydrates 1321gFiber 39gSugar 305gProtein 134g
Mexican vegan concha 😍 so fluffy and delish! and they are sold at Basic Foodie, one of my favorite places.
It’s a traditional dessert here in Mexico after having breakfast or dinner.
I can remember from childhood seeing it in all mexican restaurants and homes, usually having it with a cup of hot cocoa or coffee.. Vanilla and chocolate are the original flavors but now bakers are innovative and adding matcha & rainbow to the menu ..


Basic Foodie Artisan Bakery & Cafe at Playa del Carmen, Mexico
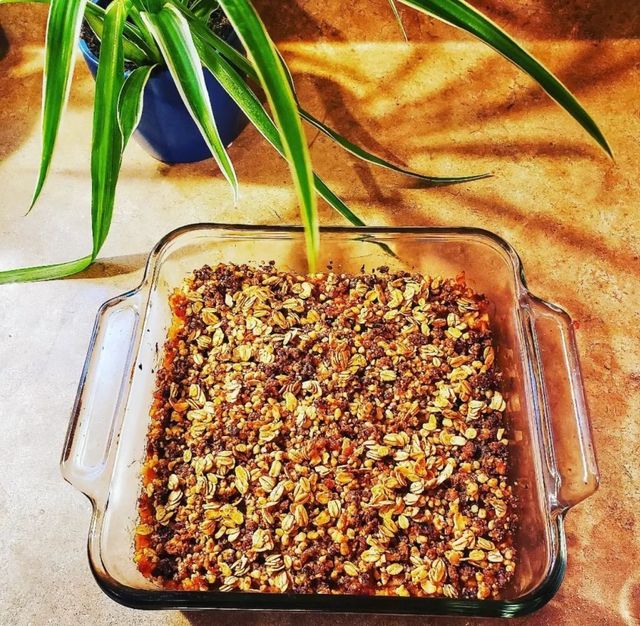
Apple Pie Crumble
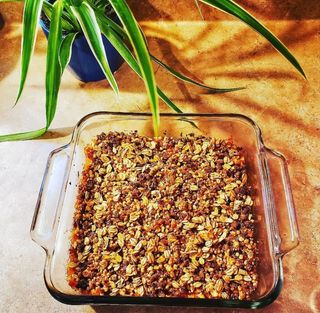
Apple Pie Crumble
– tesa🌱
Apple pie crumble
Ingredients
For the topping
- 3 dates
- 1/2 cup walnuts
- Place in a food processor
For the filling
- 6 apples
- Juice of 1/2 lemon
- 5 Dates
- 1/4 cup raisins
- Cinamon
Instructions
- Cut apples into small pieces and mix Evelyn into a food processor.
I added a bit of Granola as well for a little crunch. - Bake for 350 for 30 minutes.
Nutrition Information
Yield
10Serving Size
1Amount Per Serving Calories 133Total Fat 4gSaturated Fat 0gTrans Fat 0gUnsaturated Fat 3gCholesterol 0mgSodium 16mgCarbohydrates 27gFiber 4gSugar 20gProtein 1g
Raw Lime Ginger Pie
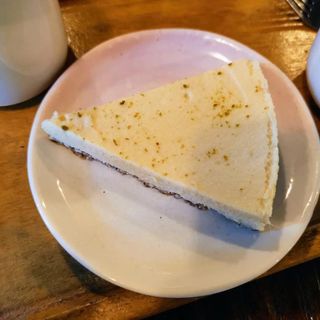
Raw Lime Ginger Pie
– Anna C
It’s my mum’s birthday today so yesterday (Sunday) we visited Tai Po Market’s @greenhub_hongkong.
It’s actually the old site of the first police station for the British Army in the New Territories more than a hundred years ago. There are some interesting displays and we really liked the vegan restaurant there. It’s called the Eat Well Canteen.
They have great raw vegan desserts and other cold and hot dishes. We especially like the Raw Lime Ginger Pie. So refreshing, especially in this weather! My mum was like, you need to learn how to make this!
@greenhub_hongkong is worth a visit! You can also check out their workshops online. Their short guided tour is also quite interesting!


Green Hub
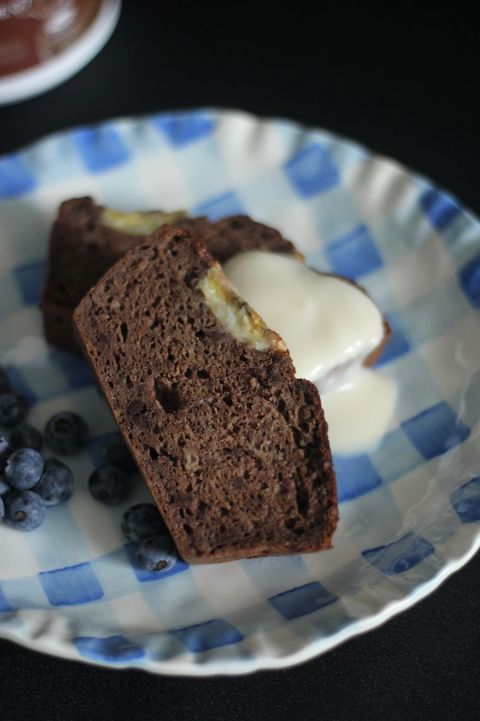
Chocolate Protein Banana Bread

Chocolate Protein Banana Bread
Recipe testing is my new daily routine 😂
This banana bread is super easy to make, one-bowl, and can be altered to almost any dietary preference ☺️
Since I made mine without oil, it is a bit denser and less sweet – just want I want for a quick filling and nutritious breakfast 👏
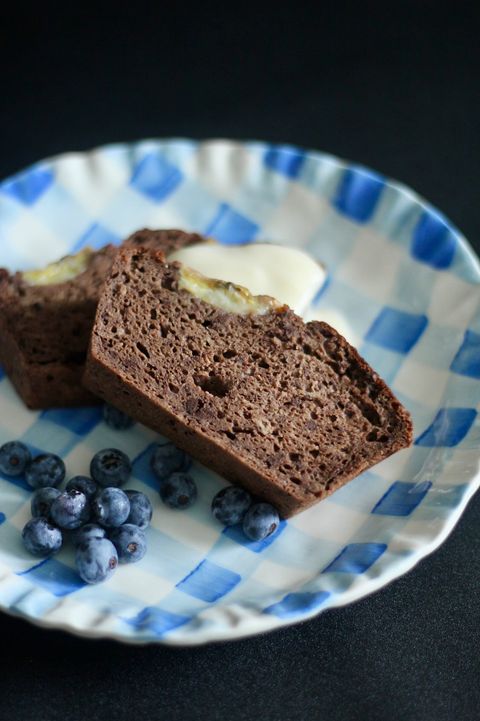
Chocolate Protein Banana Bread
Recipe testing is my new daily routine 😂
This banana bread is super easy to make, one-bowl, and can be altered to almost any dietary preference ☺️
Since I made mine without oil, it is a bit denser and less sweet - just want I want for a quick filling and nutritious breakfast 👏
Ingredients
- 180 g whole-wheat flour (I used buckwheat)
- 1 scoop (40g) Chocolate Protein Powder
- 50 g maple syrup (or other sweetener of choice)
- 8 g baking powder
- 4 g baking soda
- 5 g cinnamon
- 5 g vanilla extract
- 60 ml plant mylk
- 4 ripe bananas mashed + 1 for topping
- pinch of salt
Instructions
- Preheat your oven to 170 Celsius and prepare a bread pan.
- Mash the bananas, then add all the liquid ingredients and mix well.
- Sift in dry ingredients and mix just until you don’t see any dry lumps.
- Pour into a baking pan and place remaining banana on top, sliced in half.
- Bake for about 45 min or until a toothpick comes out clean.
- Wait for it to fully cool before slicing!
Oatly Triple Chocolate Eclair
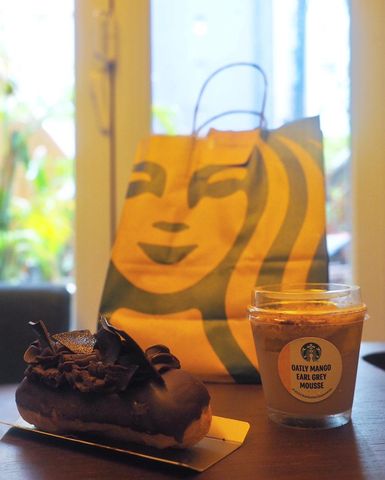
𝗢𝗔𝗧𝗟𝗬 𝗧𝗿𝗶𝗽𝗹𝗲 𝗖𝗵𝗼𝗰𝗼𝗹𝗮𝘁𝗲 𝗘𝗰𝗹𝗮𝗶𝗿
Plant powered limited-edition vegan menu 🌿
📍𝐌𝐮𝐥𝐭𝐢𝐩𝐥𝐞 𝐥𝐨𝐜𝐚𝐭𝐢𝐨𝐧𝐬
𝐒𝐭𝐚𝐫𝐛𝐮𝐜𝐤𝐬 @starbuckshk
Not a Starbucks frequenter but there is one right downstairs of my place and their new special plant-based menu has caught my eyes for some time 👀 .
Finally tried 3 out of the 5 vegan treats curated by celebrity chef Christian Yang @chefchristianyang featuring @oatly & @impossible_foods.
𝗢𝗔𝗧𝗟𝗬 𝗠𝗮𝗻𝗴𝗼 𝗘𝗮𝗿𝗹 𝗚𝗿𝗲𝘆 𝗠𝗼𝘂𝘀𝘀𝗲 (HK$38)
Never really liked mousse so this was a really delightful surprise! The Earl grey flavoured mousse was silky smooth and fragrant, and the slightly tart fresh mango bits balanced out the sweetness nicely. The only issue I had was the crumble topping was all wet and not crumbly.
🤤 4/5
𝗢𝗔𝗧𝗟𝗬 𝗧𝗿𝗶𝗽𝗹𝗲 𝗖𝗵𝗼𝗰𝗼𝗹𝗮𝘁𝗲 𝗘𝗰𝗹𝗮𝗶𝗿 ($45)
Been a long time since I had an éclair, was not expecting much because Starbucks is not exactly known for its patisserie. The chocolate ganache and the mousse inside had a right amount of sweetness, the shards on top could have been more bitter in my opinion. However, the choux pastry was quite soggy so it was a miss on the classic crispy texture.
🤤 3/5
𝗜𝗺𝗽𝗼𝘀𝘀𝗶𝗯𝗹𝗲™ 𝗕𝗲𝗲𝗳 & 𝗣𝗼𝘁𝗮𝘁𝗼 𝗪𝗿𝗮𝗽 (HK$52)
Smelled really wonderful! The wrap was packed with loads of veggies – mushrooms, onion, bell pepper and cherry tomato. I really enjoyed the crunchiness from the potato 🥔 and the juiciness of the cherry tomato. I wish they had toned down the seasoning – too salty and peppery for my taste.
🤤 3.5/5
Still a pleasant surprise all in all. Back in the days the only thing I’d get from Starbucks was the mushroom & cheese pocket and now they’ve expanded their veggie menu quite a lot. Thank you @starbuckshk @chefchristianyang for making plant-based food accessible!
🌱 Vegetarian friendly: Yes! They have other meatless options in the regular menu.
🤟 Quick and convenient: Perfect if you’re in search of some quick bites, they also have a great deal for a set.
💰 HK$50-100 pp
⭐️ Overall rating: 3.5/5
🤔 Revisit? I really liked the mango Earl grey mousse so I may get that again and try out the other two savoury treats later!


Matcha Pancakes
Matcha Pancakes
What’s your flavour?!
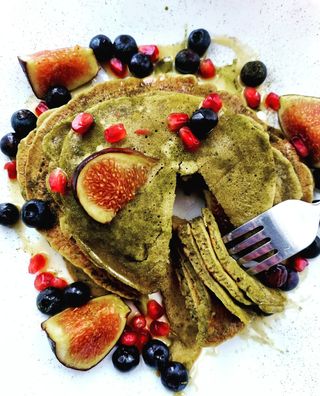
Matcha Pancakes
My ideal Sunday morning is when I get to eat pancakes 😋 I thought I'd try matcha pancakes with the matcha powder I had brought to make my morning matcha lattes.
Here is how I made them:
Ingredients
- 1 cup all-purpose flour
- 1 cup non-dairy milk
- 2 tbsp baking powder
- 2 tbp sugar
- 3 tbsp matcha powder I used @heapwell_superfoods
- 1 tbsp apple cider vinegar
- Few drops of vanilla extract (optional)
- Pinch of cinnamon (optional)
- 1 tbsp oil
- Pinch of salt
Instructions
- Combine wet ingredients.
- Combine dry ingredients.
- Then mix the dry in with the wet.
- And then top with whatever you fancy. I topped mine with figs, blueberries, pomegranate and golden syrup.
Nutrition Information
Yield
2Serving Size
1Amount Per Serving Calories 382Total Fat 10gSaturated Fat 2gTrans Fat 0gUnsaturated Fat 7gCholesterol 10mgSodium 1588mgCarbohydrates 62gFiber 2gSugar 11gProtein 11g
Lotus Biscoff Biscuits

Lotus Biscoff Biscuits
Lotus Biscoff Biscuits
Who loves Lotus Biscoff Biscuits???? 😍😍😍
Let's kick off this Monday with a simple yet delicious and addictive little number. I introduce to you the scrumptious Lotus truffles😋😋😋
Ingredients
- -Lotus Biscoff Biscuits 250g
- -Vegan Cream Cheese 120g
- -Lotus Biscoff Spread 50g (optional)
- - Vegan chocolate 200g
Instructions
- Set 2 cookies aside to crush on top of the truffles. Crush the remaining cookies in a bowl with a rolling pin to make fine crumbs.
- Add the cream cheese and Lotus Spread. Mix with the cookie crumbs. When it starts to stick together, press it with your hands to get a dough-like consistency.
- Refrigerate the dough for 60 minutes.
- Once chilled, divide the dough up into 15 pieces roughly a tablespoon size and roll into balls. You should end up with roughly 15 balls.
- Melt the chocolate in a bowl and then let it cool for a minute. Then use it to coat each ball and make sure the ball is all covered. Set the balls on a plate and sprinkle with crushed cookies from the biscuits you set aside before chocolate starts to set.
- Place them into the fridge for 1 hour, or until the chocolate has hardened, before enjoying.
Nutrition Information
Yield
5Serving Size
1Amount Per Serving Calories 574Total Fat 33gSaturated Fat 14gTrans Fat 0gUnsaturated Fat 16gCholesterol 28mgSodium 243mgCarbohydrates 63gFiber 2gSugar 35gProtein 7g
Middle Eastern Dessert🍥 – Muhallabia
Middle Eastern Dessert🍥 – Muhallabia
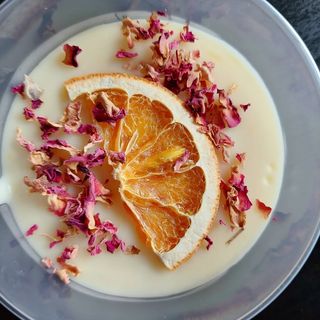
Middle Eastern Dessert - Muhallabia
I would like to share with you a recipe for a delicious Middle Eastern Dessert🍥 - Muhallabia. When you prepare it at home you can adjust the amount of sugar, when you go for the low sugar option it can be a light and satisfying dessert.
I know you can get an instant packet mix of this delicacy but it's so easy to make it from scratch I hope I will encourage you to prepare it at home👩🍳.
It's very easy to veganise, as all that we do is just replace the regular milk with a plant based version.
To prepare 2 generous portions of delicious Muhallabia you need:
Ingredients
- 500ml plant based milk (go for an unsweetened version, avoid coconut milk as it might have too strong a flavour)
- 50 corn starch
- 40g sugar or sweetener of your choice
- 1/2 tablespoon of rose water (you can substitute with a few drops of rose cake essence)
- 1 tablespoon of orange blossom water (you can substitute with 2 tablespoons of orange juice)
- Dried fruits/ rose petals/nuts to garnish
Instructions
- Warm up your milk and add corn starch, Mix with a spoon until all the lumps are dissolved. It's easier to do it on a low heat
- Add sugar, rose water and orange blossom water. Stir constantly until the mixture thickens up.
- Pour the Muhallabia into serving bowls and place in the fridge to chill for at least an hour before serving. Garnish with fresh or dried rose petals, crushed nuts , dried fruits or fresh fruits
Happy Cooking !👩🍳
Nutrition Information
Yield
2Serving Size
1Amount Per Serving Calories 1179Total Fat 13gSaturated Fat 5gTrans Fat 0gUnsaturated Fat 8gCholesterol 21mgSodium 197mgCarbohydrates 237gFiber 5gSugar 49gProtein 13g
Last but not least, a classic fair staple and a favourite to many. Cotton candy cones the whole family will love. The adventure of a sweet childhood treat from Verito.
Cotton Candy 🥰🌱

Cotton candy
– Verito
The Feria de San Pedro is a tradicional local family event where we get to ride fun attractions and play different skill games. They offer a variety of food and lucky for us vegans there are delicious spiral fried potatoes and cotton candy that is appropriate for us. It is an amazing opportunity to have a joyful day.


all images and recipes courtesy of the food bloggers